Getting to Know the Text
In this lesson, you will doing a variety of exercises to gain familiarity with Illustrator’s text functions.
Illustrator’s Text tools are fairly straightforward to use, but can sometimes be confusing to work with. But by using all of the tools Illustrator has to offer, managing and creating your work can be simplified.
This exercise will cover the Type tool, Area Type tool, and Path Type tool. The three vertical variations of these tools won’t be covered because the only difference is the orientation of text.
Preparation
- Create a new document, landscape orientation.
- Next, enable the grid (View > Show Grid) and Snap to Grid (View > Snap to Grid).
A few things to keep in mind when using and manipulating type:
- The Selection and Direct Selection tools select the whole object, not a specific section of text, so you should use them to move the entire type object around.
- Use the Type tool if you want to select and edit certain words or letters.
- Use the Character and Paragraph palettes to change a variety of type attributes.
CREATING A CUSTOM TEXT LOGO
 Select the Type tool. Click at the center of the artboard and type “SACG” in capital letters.
- Open the Character palette through choosing either Type > Character or pressing
T (PC) orT (Mac).- Change the font to Arial Black, Italic
- Change the size to 150 points
- Change the tracking (spacing between letters) to -175
After giving the text those attributes, it looks better, but we’re still not satisfied with the way it looks.
- Text must be converted to outlines before its shape can be edited. Once your text is converted to outlines, the Type tool and Character and Paragraph palettes can no longer edit the appearance, however, because it is now treated as a normal object composed of paths and anchor points.
- Select the type object.
- Right-click on the type object and select Create Outlines from the context menu. You should now be able to see the actual path shapes rather than just a bounding box when selecting the object.
- We don’t like the way the ends of the “S” angle. Same with the “C” and “G,” so we’ll straighten them out now.
- Examine the picture below.
- Zoom in on one end of the “S.”
- Select the Direct Selection Tool.
- Select the two anchor points, right-click, and select Average Object > Path > Average (
J ). - Choose Horizontal and click on OK. This should straighten the end. If you get weird results, undo your action (
Z ), and make sure that you select the anchor points closest to the end.
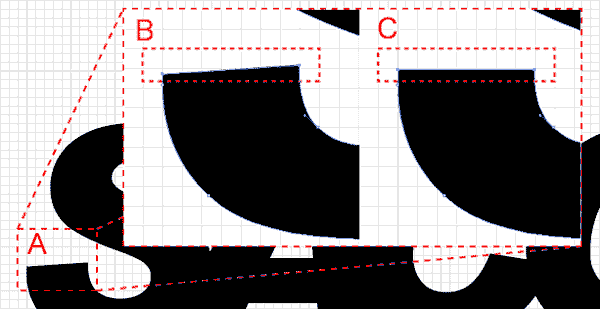
- A. Zoomed image.
- B. Two anchor points selected using the Direct Selection tool.
- C. Result after the Horizontal Average action.
- Follow the same procedure for the areas highlighted in the picture below. Remember to select only two anchor points at a time! For the letter “C,” use the Lasso Tool (Q) to keep from selecting parts of the letter “G,” and select one anchor point a time, holding down the
key to select the second anchor point. 
- The logo still needs a little work:
- Select all the letters.
- Unite their paths using the Pathfinder palette (the letters were previously individual shapes that were grouped together).
- Next, create a rectangle similar to the one shown, making sure it covers the highlighted areas.

- Subtract the rectangle from the “SACG” shape:

MORE EFFECTS
There are many more things you can do. Try to remove the bump between the “S” and “A,” or try to remove the notch between the “A” and “C” using the Pen tools. Change the color, or add other objects. Once you convert a text object into an outline, you can manipulate almost anything.
Creating Type that Conforms to Paths or Shapes
- Create shape of desired path or object.
- Select the Path Type tool.
- Pay attention! The object you want type to conform to will disappear, so if you want to preserve it, copy it now!
- Click on the object’s path or outline. Do not click inside or outside the object or you will just create normal text.
- Type in your desired text.
Text conforming to curved path:

Everything about the object is still editable, from the text to the path. If you want to edit the text, use the Type tool as normal. If you want to edit the curve, use the Direct Selection tool as normal.
AREA TYPE AND TEXT BLOCKS
- Create two rectangles with heights that span the height of the page. Move them so there’s space between them.
- The object you want type to constrain to will disappear, so if you want to preserve it, copy it now.
- Select the Area Type tool.
- Click on the object’s outline. Do not click inside or outside of the object or you will just create normal text.
- Type, or copy and paste, more text than the shape can fit. An Overflow icon will appear at the bottom right of the shape.
- Select both the text object and the other rectangle.
- Select Type > Blocks > Link. The text should then flow into the the other rectangle.
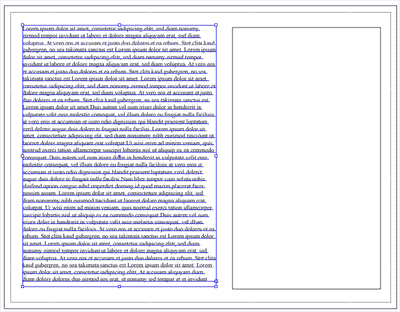
Text constrained to a rectangle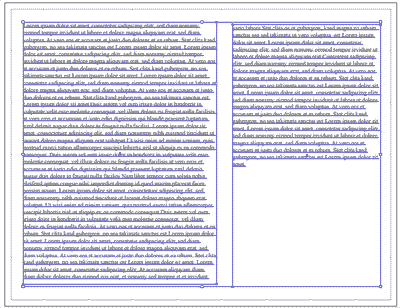
Text flowing into another rectangle
You can link text to other shapes beyond just rectangles: any shape object can have text constrained to it.
TEXT WRAPPING
You can also make the text conform to shapes within text blocks.
- Create a shape and move it over the text.
- Select the text block and your shape.
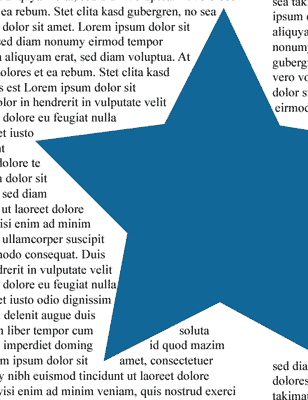
- Select Type > Wrap > Make. The text should wrap around the shape as shown in the example.
You can move this shape later using the Direct Selection tool.
