Who this guide is for
This guide is intended for people who would like to use Jupyter Notebooks as a managed service to support teaching and learning at the University of Washington, but are unfamiliar with the technology. Watch a short video showing Jupyter Notebooks in action.
Introduction & key concepts
The UW JupyterHub for Teaching service provides UW hosted computational environments that require only a web browser to access. These environments are made available for UW courses by request and at no cost, and allow faculty and students enrolled in the course to access a Jupyter Notebook environment of their own. A JupyterHub for the entire course is also created, which allows users to log in with their UW NetID and provides shared tools and management capabilities for instructors. When requesting a Hub for their course(s), instructors can choose from one of several preconfigured Notebook types or create one of their own and use that instead (we refer to these as Notebook images). The different Notebook images provide for different suites of installed software and Python packages using Pip or Conda, based on the teaching requirements. When a user logs into their Notebook using the JupyterLab, Classic Jupyter Notebook, or RStudio web interface, they will have access to interactive notebooks and scripts, the pre-installed software and tools, a Linux filesystem and terminal, and custom components that are provided by the Notebook image that was selected. Instructors can also specify a Git repository be synced with each student’s environment in order to distribute course materials automatically.
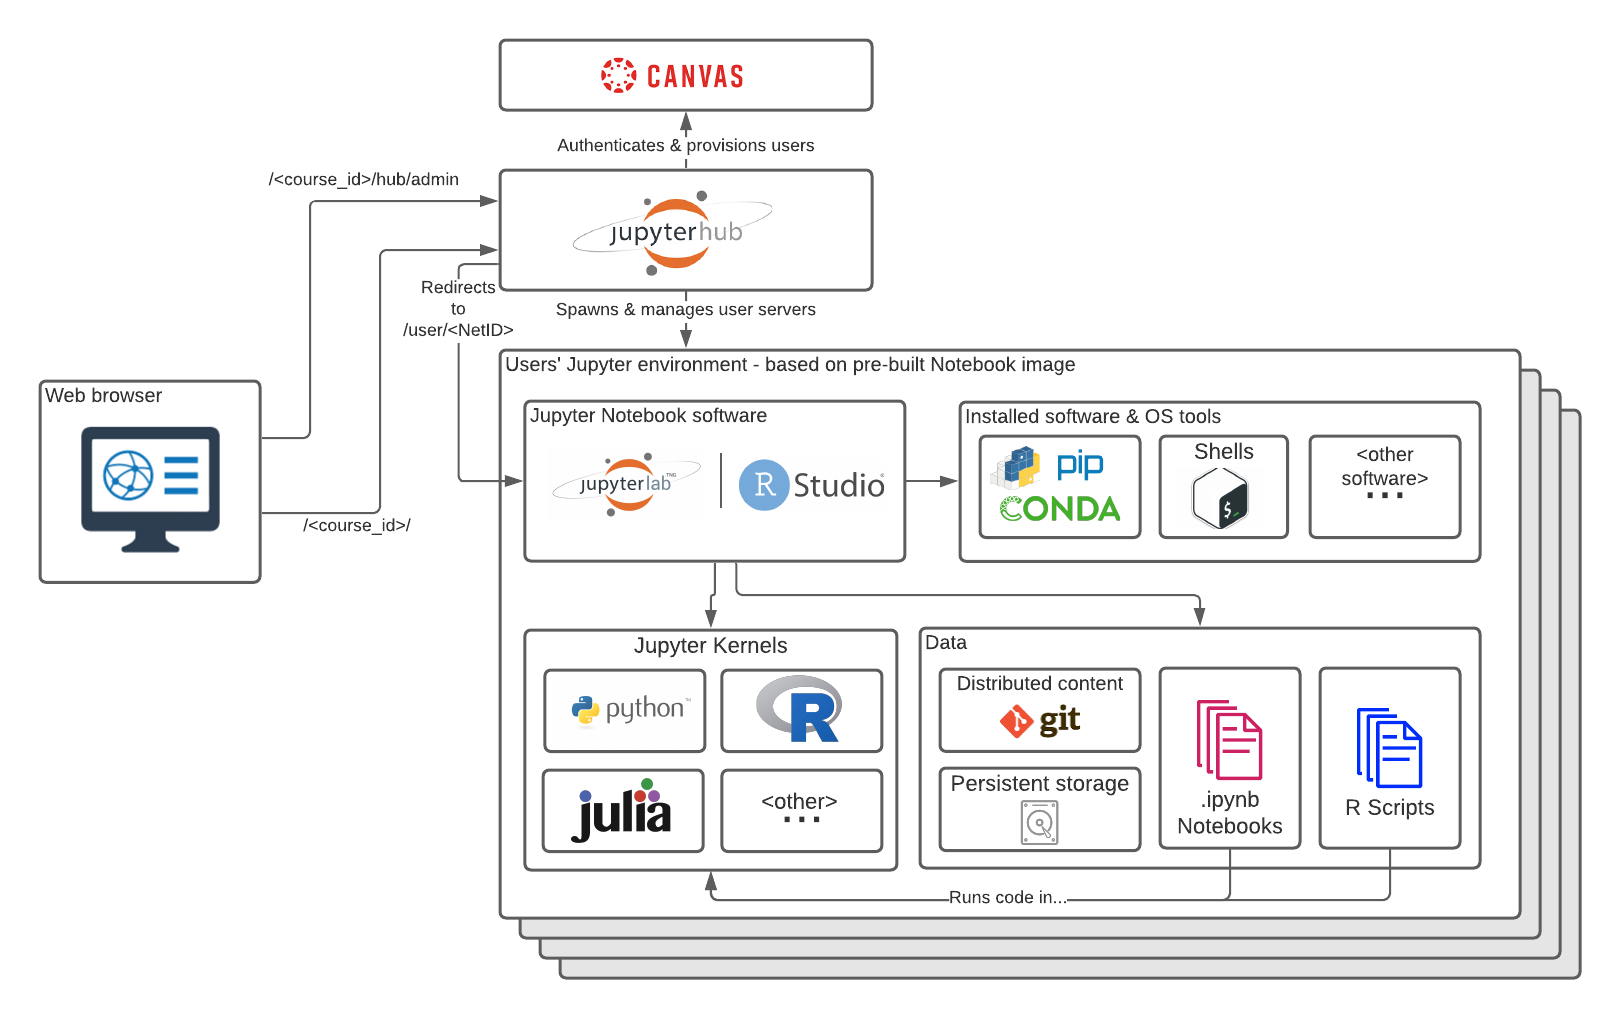
The diagram above illustrates a typical course configuration.
- Students and faculty need only one URL, which handles logging them in using their UW NetID, then starts up their own Jupyter environment as configured for the course, redirecting them to it when it is ready. Once logged in, they will use the JupyterLab or RStudio user interface to work with interactive .ipynb notebooks, R scripts, language interpreter windows, shells, and any other installed software called for by the course. Their saved work, and any data or other files that they added are saved to their own drive, which is available for the duration of the quarter.
- Ipynb Notebooks are the most common document type for students to work in. They can view and add marked up text as well as run code written in code cells in the document, using the installed interpreter for whichever language is being used (orchestrated by the kernels). Ipynb files can be uploaded and downloaded from the Jupyter environment, as well as be exported as PDF or HTML for offline viewing.
- Faculty also have access to the JupyterHub admin page, which allows starting, stopping, and accessing individual user Jupyter environments if needed.
- If the course is configured with a Git repository, users will have the contents of the repository in their drive updated every time they log in.
Course design fundamentals
Determine software and libraries
Once you’ve decided to use Jupyter Notebooks in your course, the next step is to determine what software and packages you would like your students to use and review the standard base images to determine which will be suitable, or if a custom image is needed. Learn more about UW supported images. Note that it is possible to have students install additional dependencies themselves during a session, but the installed software does not persist on their Jupyter Notebook server due to the immutability of the Notebook servers. This is generally a benefit as it helps with reproducibility of work in student notebooks, as well as ensuring that students can always return their environment to a known working state by restarting their session. For packages installed with pip, students can use the following syntax to install packages into their home directory and avoid the need to reinstall each time a session starts: pip install --user <some_package> (or, in a notebook code cell: !pip install --user <some_package>).
Set up the Notebooks
At this point, you will also begin to create the notebook(s) with the lesson materials and interactive elements for your students. If you are starting from scratch, you may want to review some examples of existing notebooks to get an idea of what is possible:
- Example Notebooks
- UW eScience showcase
- Open handbook: Teaching and Learning with Jupyter
- Best practices
Prototype and test
Depending on how complex your notebook is, you can either prototype and test the course using Jupyter Notebook running on your own computer, or by running one of the supported UW JupyterHub for Teaching Jupyter Notebook images locally using Docker.
Request and manage a Hub
Once you have determined the Jupyter Notebook server requirements based on the Notebook(s) you would like to run in your course, you can submit a request for a course Hub on the IT Connect page. Requests should include:
- The Jupyter Notebook image you would like to use (if it’s a custom image, include a link to the image on a public container registry such as DockerHub or GitHub Container Registry).
- A public git repository containing the course files (if that is how you intend to distribute course materials).
- A list of users who should be designated as Hub admins.
- Any special requirements for your Jupyter Notebook, such as additional memory or larger capacity persistent disk for the notebook servers (typically needed if you intend for your students to work with large datasets. The standard allocation for Notebook servers is 2GB memory and 5GB persistent disk.
After your Hub has been provisioned, you will be provided with a link that allows you to log in with your UW NetID. As an admin, you will be able to access your own Jupyter Notebook server, as well as an admin page where you can view and access student Jupyter Notebook servers. You can also designate other users as admins from this view.
JupyterHub Admin view:
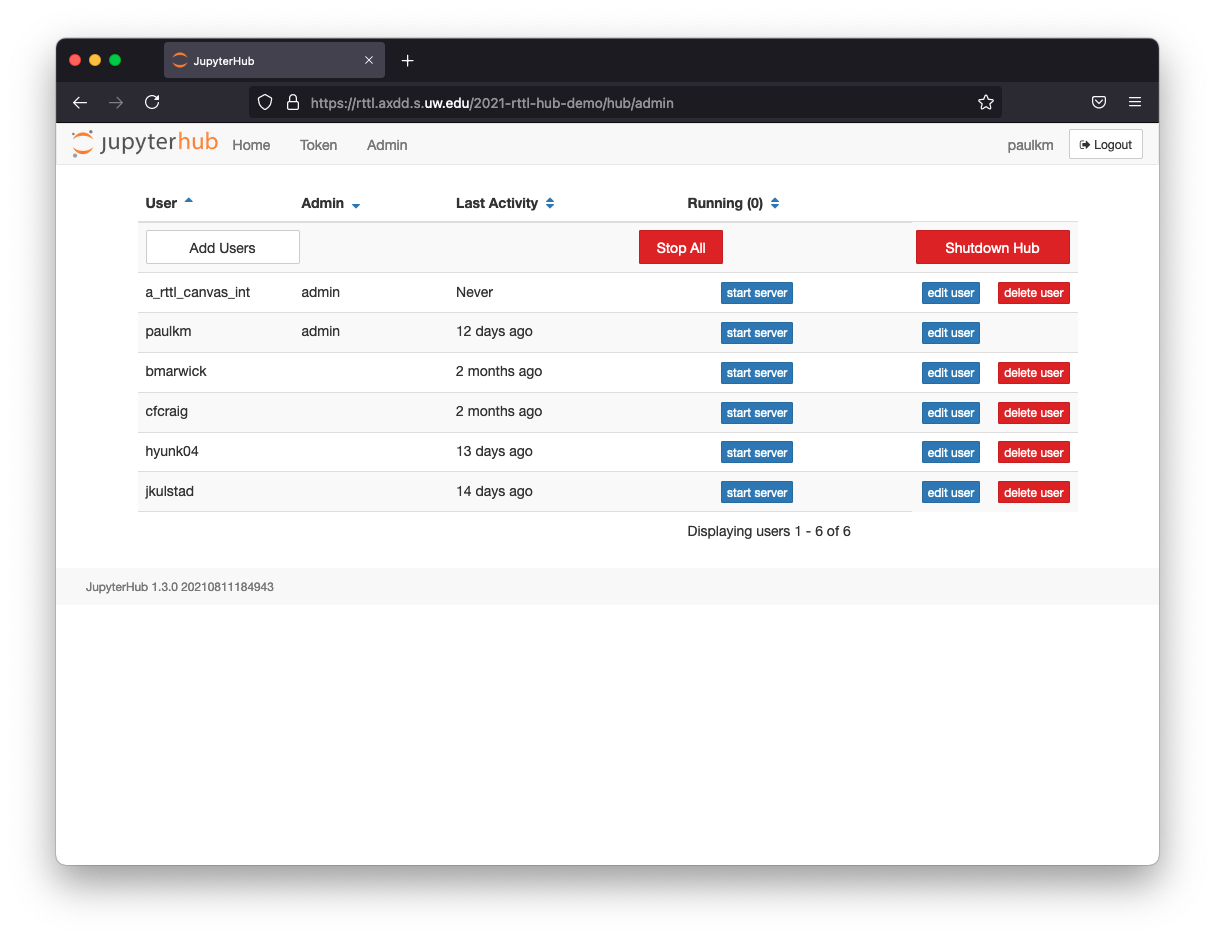
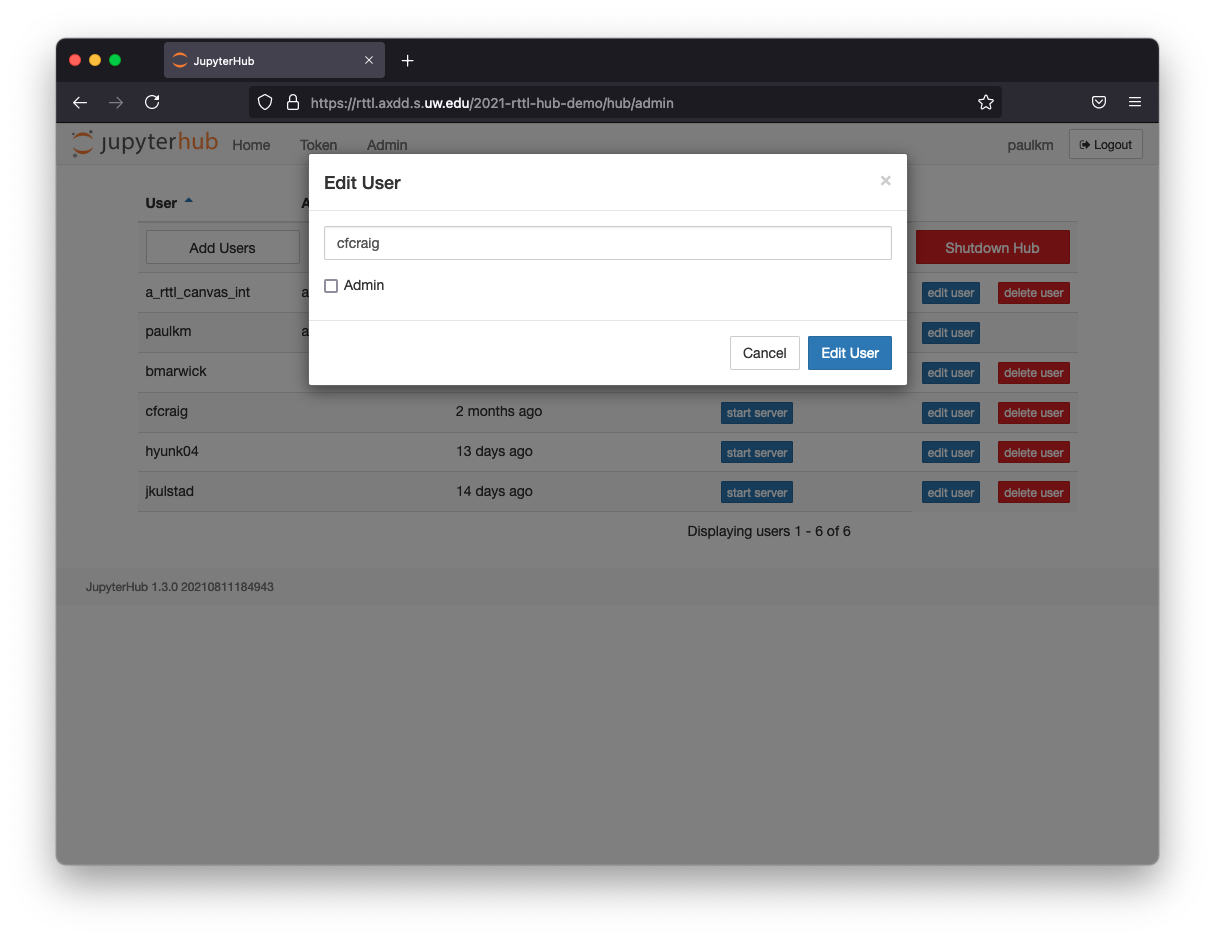
In the hub admin page, clicking start server next to any user’s name will start their Jupyter Notebook server and redirect your browser to the JupyterLab view. If the server you’re starting is not your own, there will be an additional authorization prompt. Clicking edit user allows you to grant admin access to that user and change the name (Note: changing the name can have unintended side effects and is not recommended).
Edit user view:
Sample Jupyter Notebook server view:
This is the main view for interacting with the Jupyter Notebook server. The interface shown is “JupyterLab,” the newer interactive environment which supersedes the original Jupyter Notebooks classic interface. You can find documentation about this interface is available from the built-in help menu item (“Help” > “Jupyter Notebook Reference”) as well as on the JupyterLab Interface site.
Sample notebook loaded:
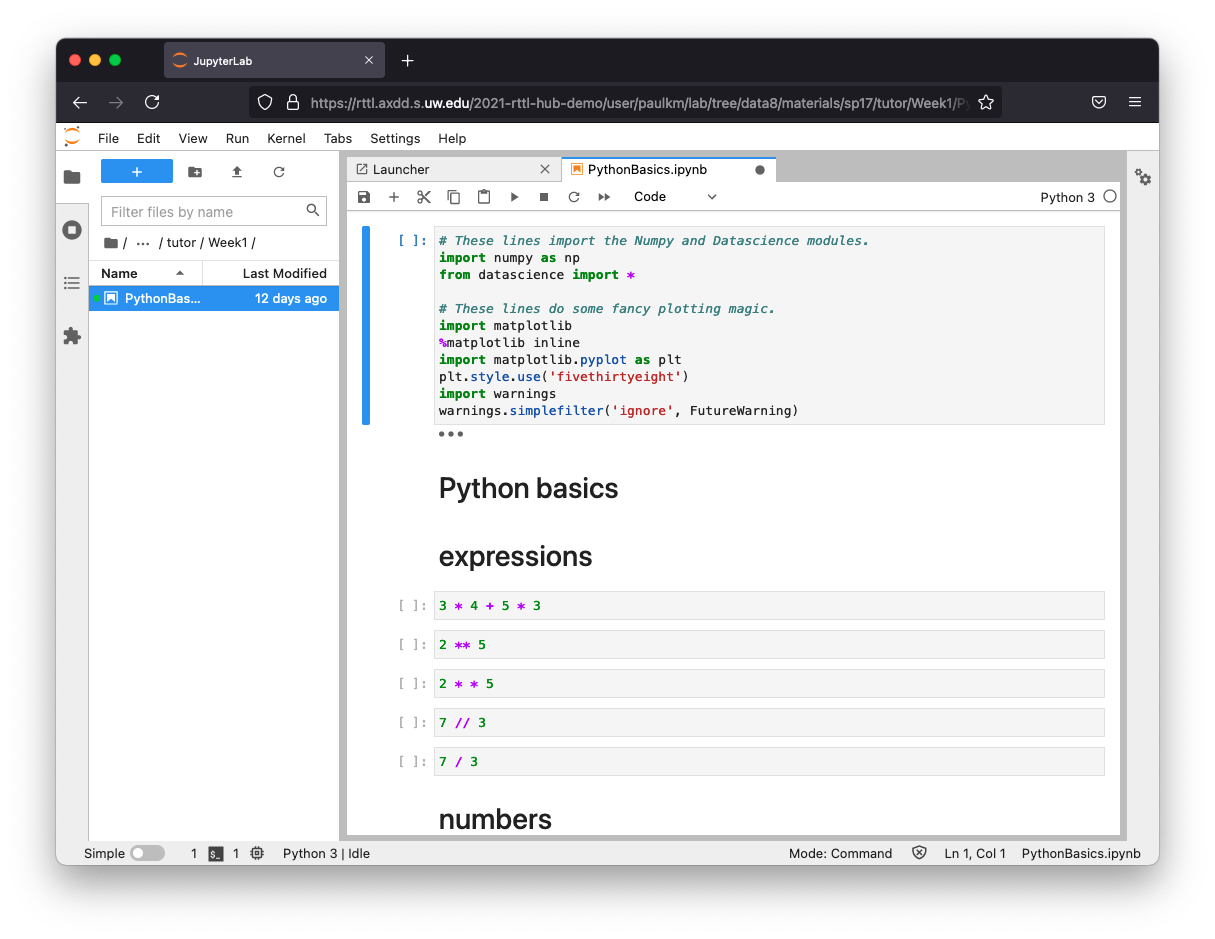
The notebooks are the main area where users will be spending their time. Jupyter notebooks are documents with the “.ipynb” extension that combine live runnable code with narrative text (Markdown), equations (LaTeX), images, interactive visualizations and other rich output. Detailed documentation is available on the Jupyter Notebook site.
Some caveats to bear in mind when designing and using notebooks:
- Your goals with code samples should be carefully considered. Jupyter Notebook is not an IDE, and lacks features such as code completion, type hints, etc., that a modern IDE user would take for granted.
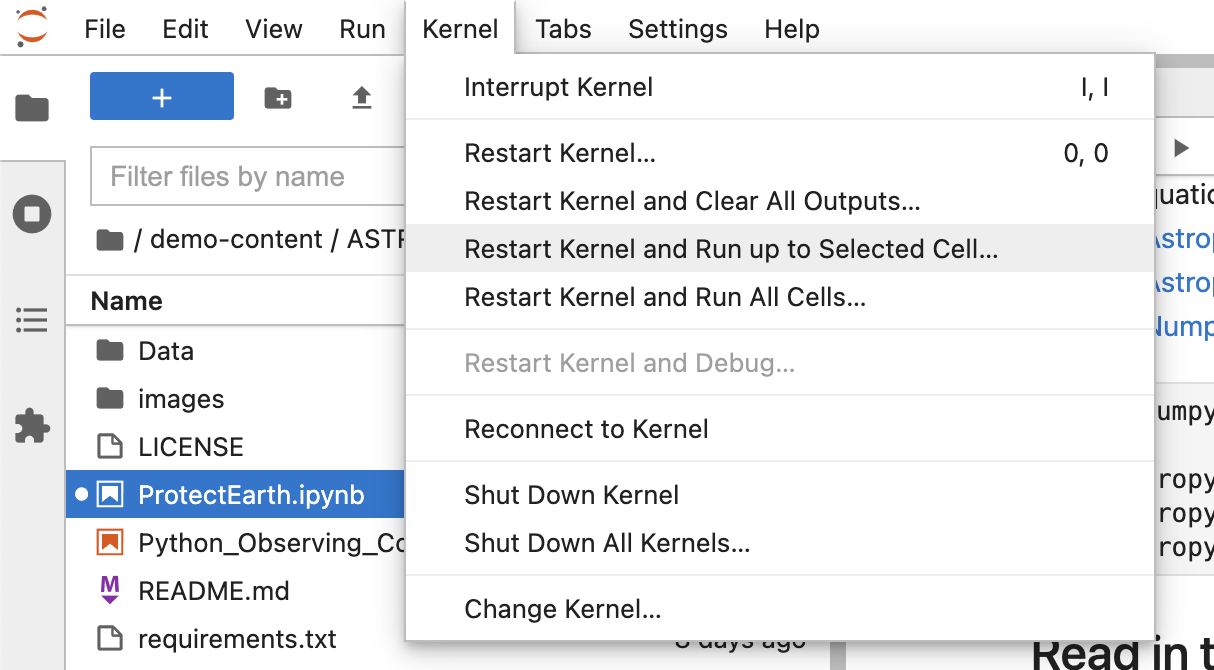
- Because you can execute code cells in any order, it’s possible for programs to end up with results that do not reflect what your code implies when read from top to bottom. When results seem inconsistent, try restarting the kernel [see image below] and running cells from top to bottom.
- Manipulating very large data sets can cause out-of-memory errors that will crash the kernel, so planning ahead as to the impact of the data sets you will be working with is recommended.
- Restarting kernel from document view:
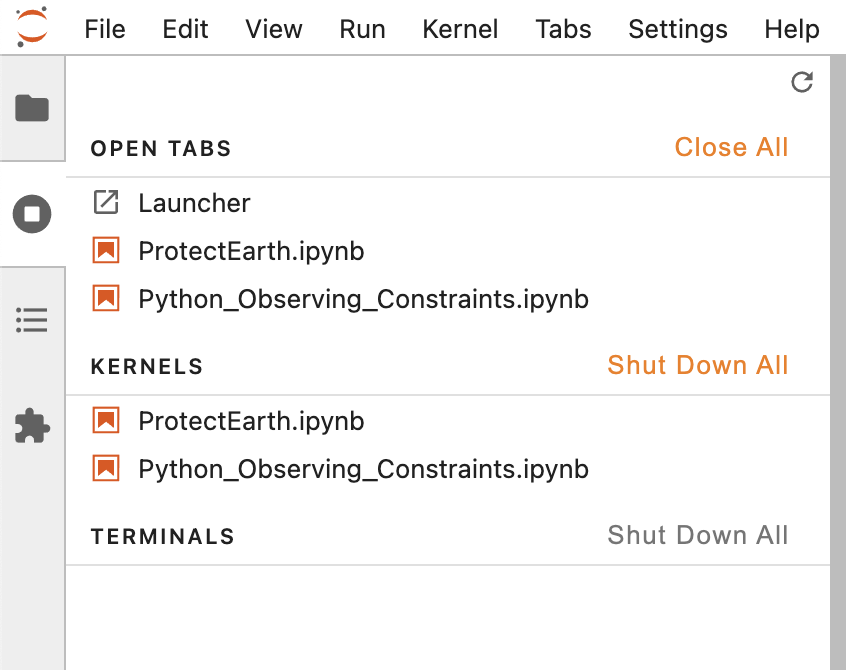
- Viewing and managing open documents and kernels:
Next steps
- Register to get a JupyterHub for your courses
- Connect with the UW JupyterHub for Teaching and Learning team by sending an email to help@uw.edu with “UW JupyterHub for Teaching & Learning” in the subject line. You can also request to be added to a demo JupyterHub for evaluation and testing purposes.
- Read more about this service on IT Connect and the UW-IT Service Catalog.
- For research and compute-intensive needs, the UW Hyak compute service offers Jupyter Notebooks. View their service information in the UW-IT Service Catalog and on hyak.uw.edu.