Panopto is the UW-IT supported lecture capture solution. You can use Panopto to easily record and review videos from courses, lectures, and presentations. Recordings in Panopto are viewable on most Web browsers and mobile devices. This document describes how to create a recording using Panopto for Windows or Panopto for Mac.
Alternative ways to create recordings:
- Use the Mobile App on your iPhone or Android
- Schedule recordings in classrooms
- Use Panopto Capture, a browser-based recorder
Before you create a recording using Panopto for Windows or Panopto for Mac, you must have access to Canvas and install the Panopto Recorder.
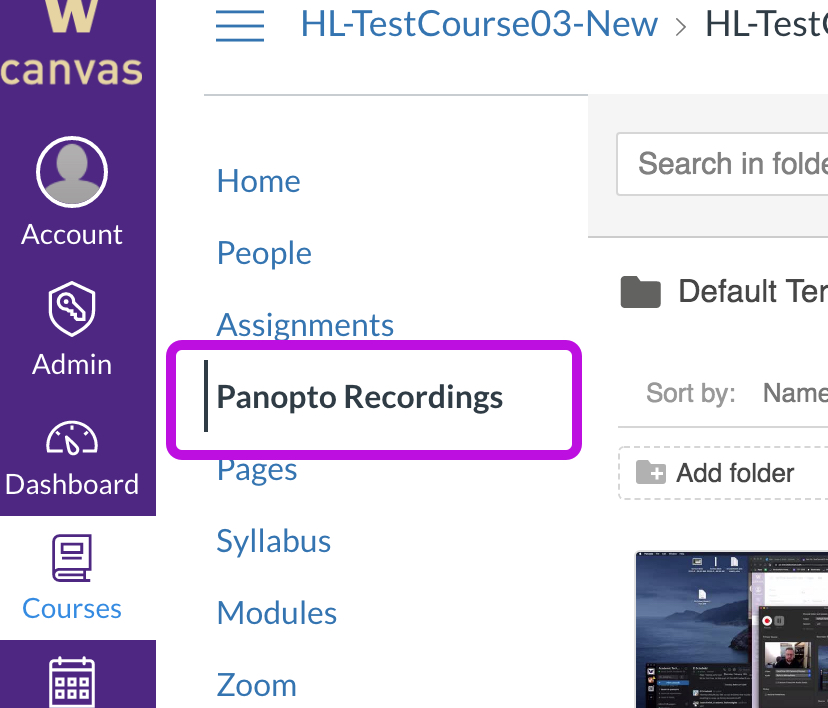
- In your Canvas course, from the course menu, select Panopto Recordings.
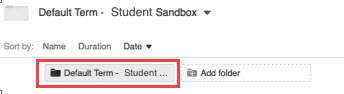
- Students only: If your instructor set up an assignment subfolder, be sure to double click it before you create your recording. You may need to hover over the folder to see the full folder name.
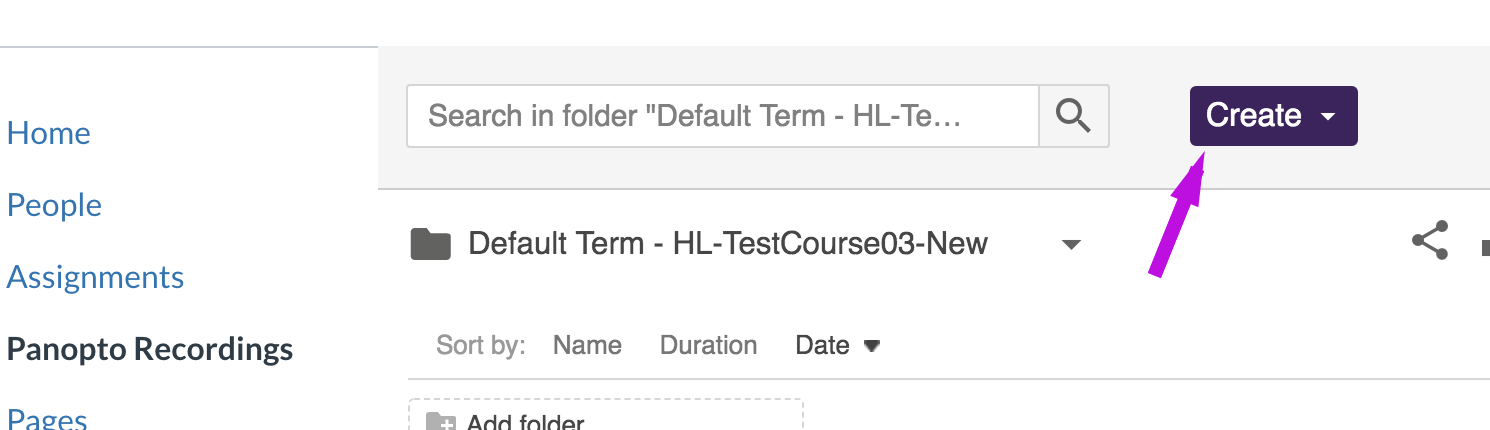
- Click the Create button
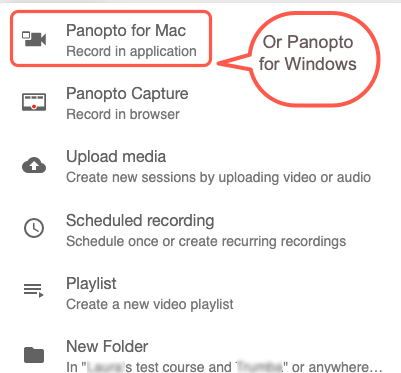
- Click Panopto for Mac or Panopto for Windows
- Launch Panopto, or if you see a pop-up appear, click Open Panopto or Allow.
- Configure settings for your recording.
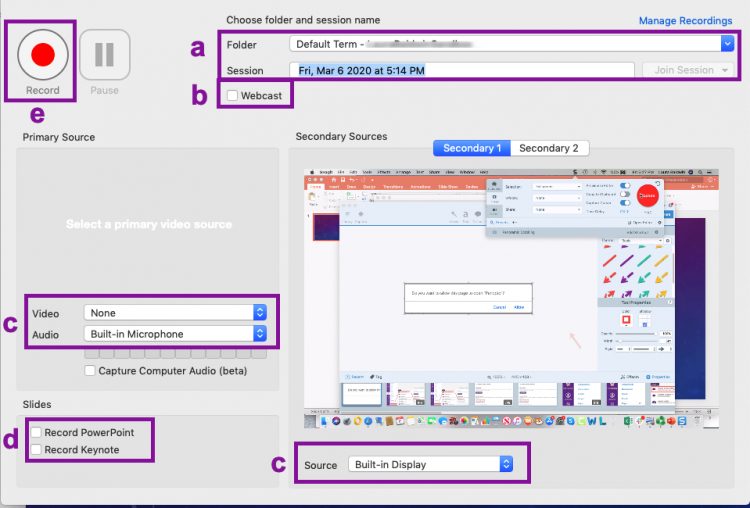
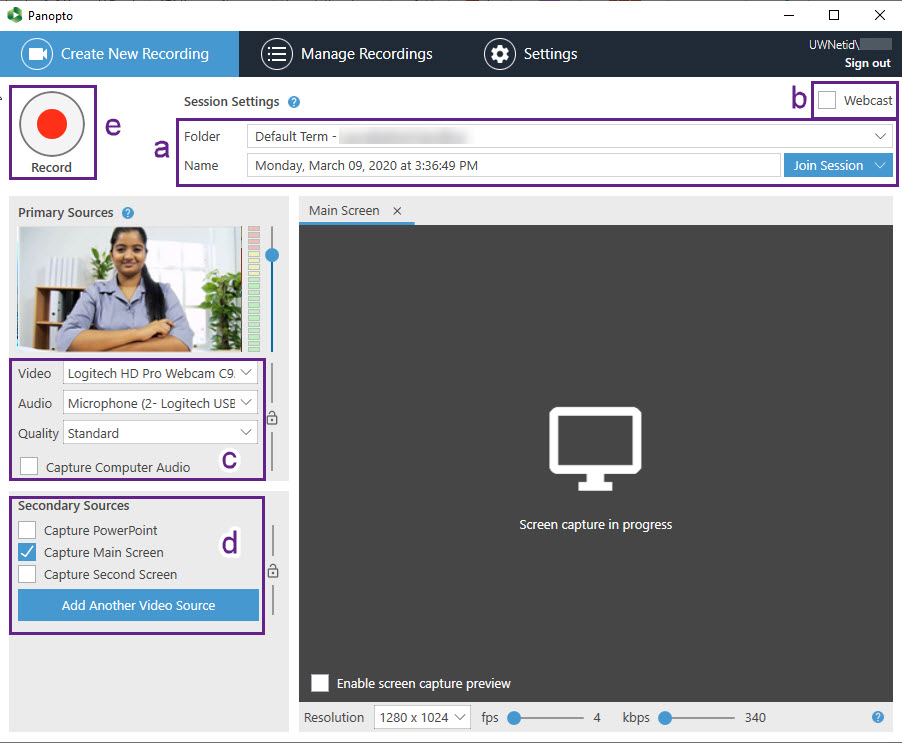
- Select the folder for your recording. By default it will be your course folder. (see a in image below)
- Optional. Enter a name for the recording that will be easily identifiable by your audience. By default the name will be the date and time of recording. (a)
- Optional. If you wish to broadcast your recording, check the Webcast box. (b) Note: If you want your students to participate in a discussion or ask questions, we suggest using Zoom because Panopto has a small time delay. Also, webcasts in Panopto are not available to the public.
- Make sure that an audio and video source are selected. (c)
Note: At a minimum, an audio source must be selected in order for the recording to be complete and usable. - Choose if you want to record PowerPoint or Keynote capture. (d) Note: In order to properly record PowerPoint presentations, after you have launched PowerPoint, you must have it in full-screen presentation mode.
- To begin recording, click the red circular Record button. (e) To finish the recording click Stop
-
Mac recorder -

Window recorder
- Windows only:
- Test your audio by talking in a normal voice to test volume. You should see a few green bars appear under Primary Sources as you talk. If you don’t see any or see the red and yellow bars highlighted, adjust the volume by using the slider.
- You may change the following settings, but in most cases you’ll be fine leaving them as is:
- If you will be moving quickly around your screen, adjust the fps setting at the bottom of the screen up to 15.
- You may also adjust the resolution Note: If you select a smaller resolution, items on the screen will appear larger in the final recording.
- Note: the kbps (kilobytes per second) will adjust automatically based on the settings for resolution and fps.
- Optional. You may enter a description that will display under the recording title in Canvas and Panopto.
- When you are ready to upload the recording, click Upload. You will see the upload status on the Manage Recordings screen.

Note: For students to access Panopto recordings linked or embedded in Canvas Pages or Modules, they must first click the Panopto Recordings tab in the course navigation. This establishes their permission to access to course recordings.