This guide shows you all you need to know to start recording in the Odegaard Sound Studio as quickly and easily as possible. First we will rundown through the correct settings on the hardware. Run through this checklist:
Hardware
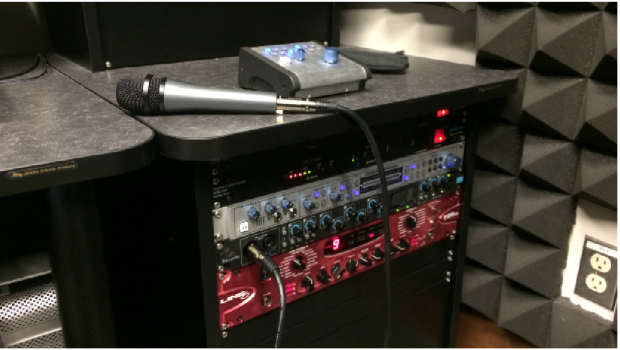
Presonus Central Station:
1. In the “Main” and “Cue” sections, you must select the “TRS 1” button. It will be lit up blue if it is correctly selected.
2. Make sure the big blue “Main Level” knob is turned up on the Presonus Central Station and Remote.
3. The button “A” must be selected in the “Passive Speaker Control” section.
4. Mute, Dim, and Mono buttons should not be activated (they must not be lit up). They are located below the Speaker Select buttons.
Focusrite Saffire Pro 40
1. The “Monitor” knob must be turned up all the way.
2. The Dim and Mute buttons should not be activated. If they are lit up, press them so that they are no longer lit up.
3. Make sure the “MIC 48V” button is not activated on the “5-6” button.
4. Plug in your microphone (with an XLR cable) or instrument (with a 1/4” cable) into “Input 1” on the Saffire Pro:
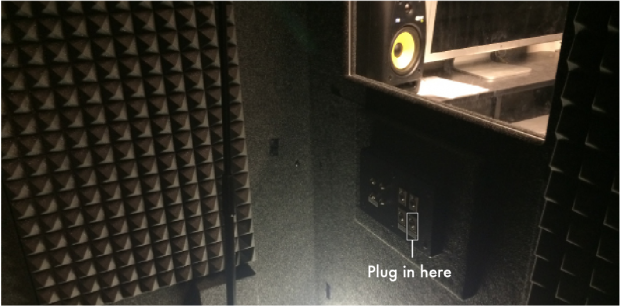
5. If you wish to record vocals in the recording booth, plug into “CH 3” in the booth:
Now that everything is plugged in, open up Audacity on the computer.
Audacity
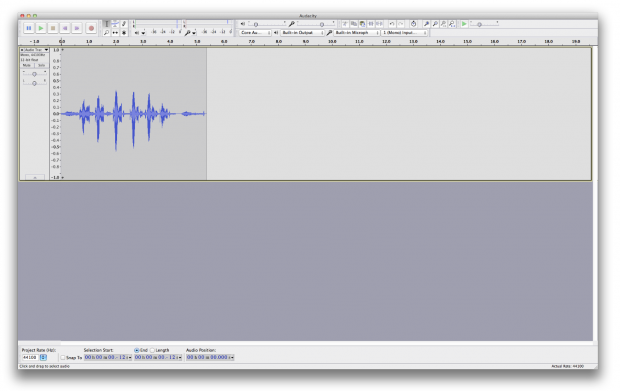
1. If you are recording from “Input 1,” all audio settings shown here should be selected as such. However, if you are recording from the vocal booth, the input in Audacity (seen in the picture below as “1 (Mono)”) should be selected as “3”
2. While testing your signal (i.e. speaking into the microphone or strumming your guitar), turn up the “Gain” knob on the appropriate input channel on the Saffire Pro 40 interface to an appropriate level. Turn up the gain too high and the audio will ‘clip,’ causing distortion. Too low will result in an unfavorable signal-to-noise ratio, which consequently leads to a low quality recording.
3. Now you are ready to record audio. Click the record button in the transport section (the red circle in the top left corner) – you are now recording audio.
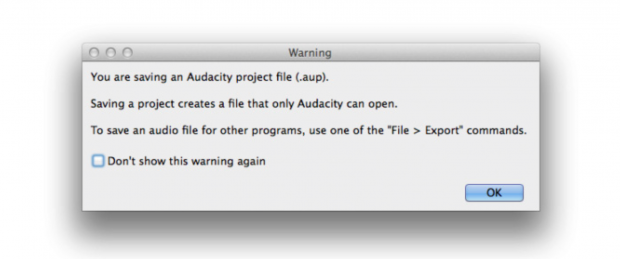
Once you have finished recording, you want to save your project and export your audio. Please be aware that saving and exporting are two separate functions and yield different results. To save your project, navigate to File > Save from the menu options. If this is your first time saving, you will see the following message:
In other words, using File > Save saves all the audio files used in the session, as well as all edits, volume adjustments etc. If you try and send this file over email, the person you’ve sent it to will need to download Audacity in order to listen to the recording. This is beneficial if you wish for your project to be edited by someone else, but not so much so if you just want to distribute the recording as an audio file. For a more universal medium, use, as the dialogue box suggests, File > Export. This will create a single audio file, in the format you desire, that you can distribute to your family, friends, or fans. After you export, you cannot readjust levels and effects, but you can always make edits in the Audacity project file and re-export. You can change the output format of your export by clicking the Format drop down menu when prompted for a file name. You can learn more about different formats and their uses in our “Introduction to Digital Audio” tutorial.
Congratulations. You have successfully recorded and created an audio file!


