Accessing the mapped drives
To open these files when you are on the UW campus network, click on the drive letter. If you are prompted for login credentials, you will enter: netid\your netid in the user name field and your UW NetID password in the password field.
Using the MWS VPN or Husky OnNet when accessing the mapped drives off-campus
To open these files if you are not on the UW campus network, you will first need to connect to the MWS VPN or Husky On Net VPN. Once you are connected to one of the VPN services, click on the drive letter. If you are prompted for login credentials, you will enter: netid\your netid in the user name field and your UW NetID password in the password field.
How to map a drive to your Managed Workstation files
If you are already using a MWS computer, your H & I drives should already be mapped via Group Policy when you logon to your computer. If the drives are not appearing after you logon, restart your computer to see if this will recreate the drive mapping for you.
Only follow the steps below if you are using a non-MWS workstation, a Mac/Apple workstation, or if your MWS workstation drive mappings are not appearing.
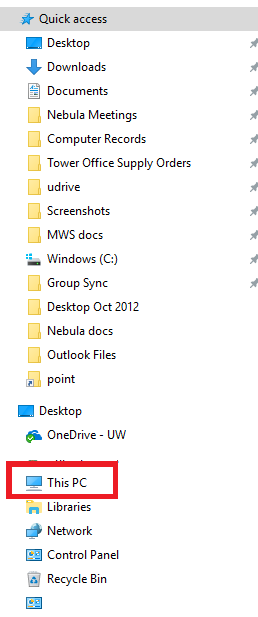
1. Open Windows Explorer and click “This PC”in the navigation pane on the left hand side.
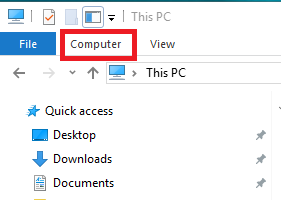
2. Click “Computer”tab at the top to open a new ribbon.
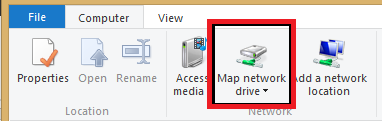
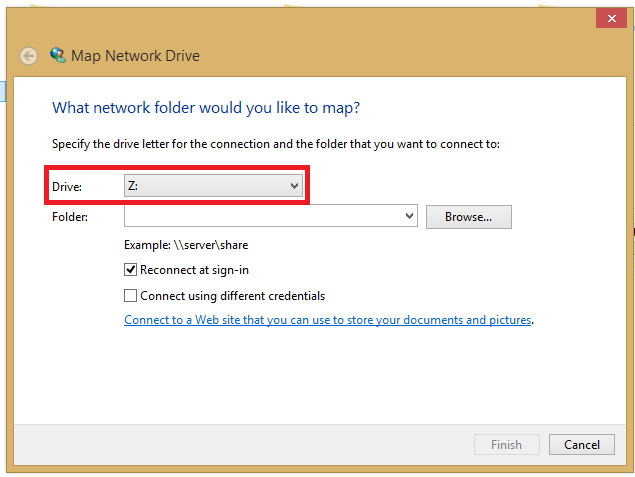
3. A new ribbon will appear. Click “Map Network Drive”and a new window will open.
4. Click the drive letter from the drop down menu. You can only use letters that are not assigned to existing network drives.
5. After clicking the drive letter, copy/paste:
I:drive (Shared Directory): \\netid.washington.edu\mws
H:drive (Home Directory): \\netid.washington.edu\mws\homedir
Into the “Folder” field Under the “Drive” you just created.
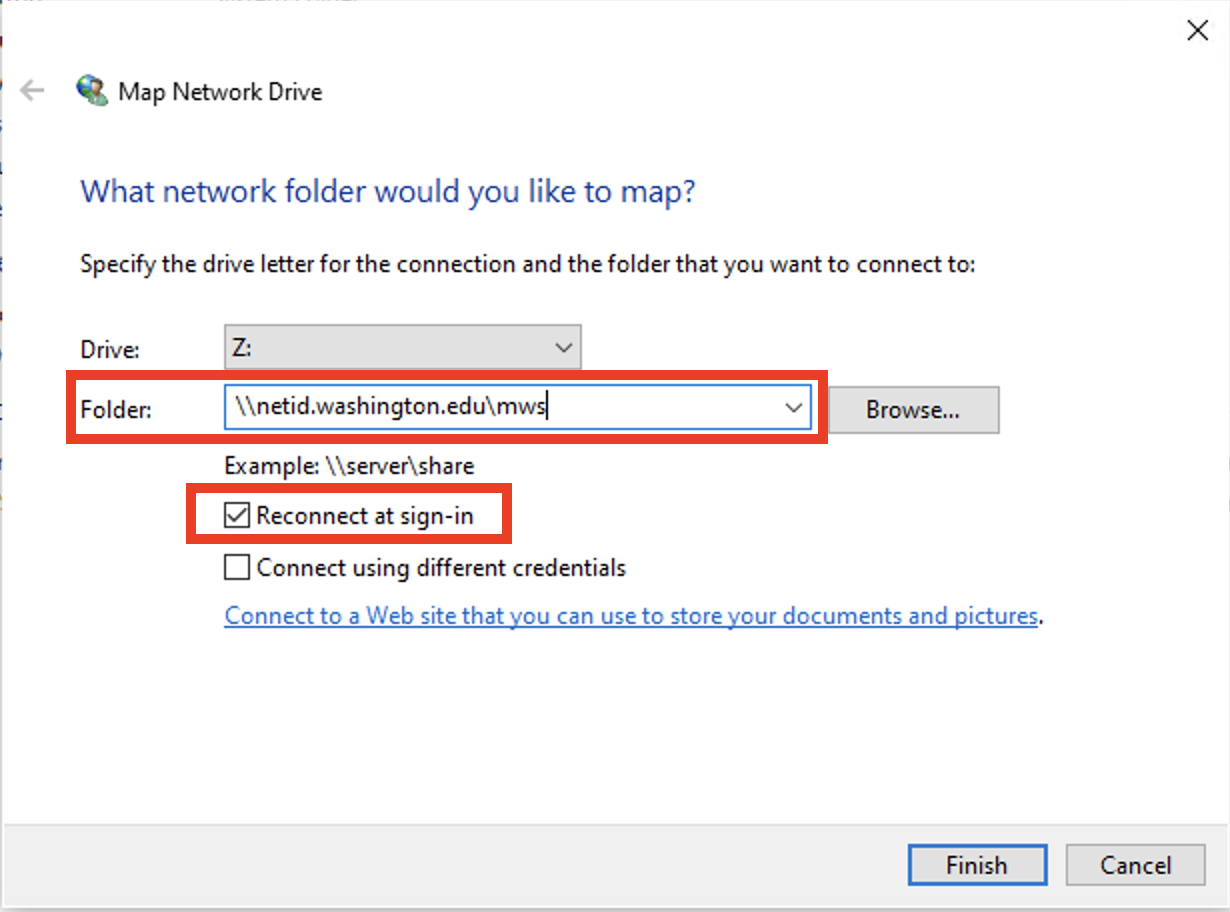
6. Check the box “Reconnect at sign-in”, then click “Finish”for each drive you need to have mapped
The drives will now appear in your Windows Explorer screen.
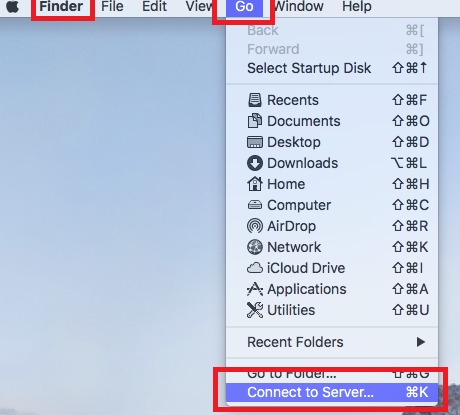
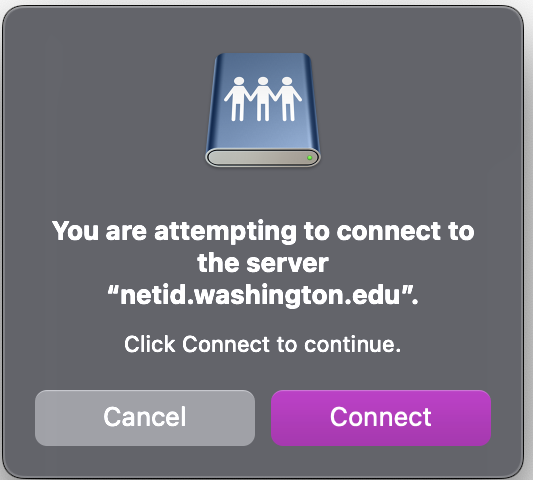
1. Finder > Go > Connect to server and add
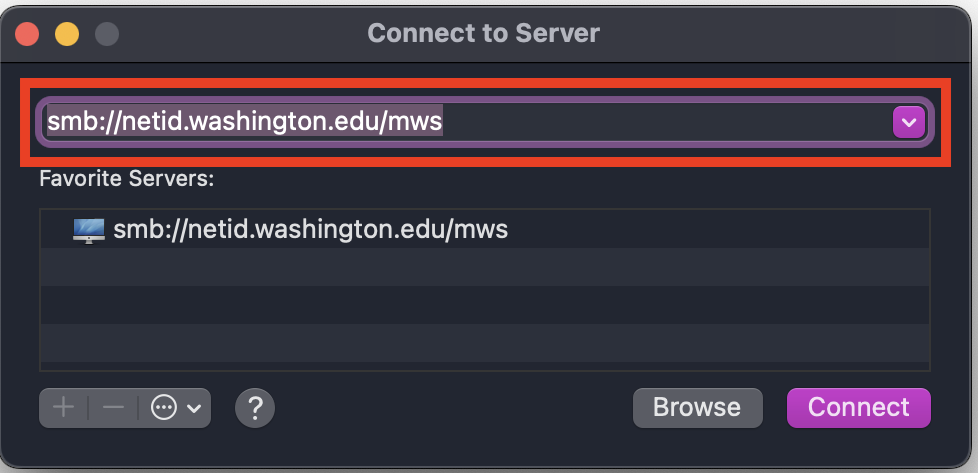
2. Enter smb://netid.washington.edu/mws in the address field and click Connect
4. Depending on what version of macOS you are running, you may be prompted to connect to the server. Click connect to proceed.
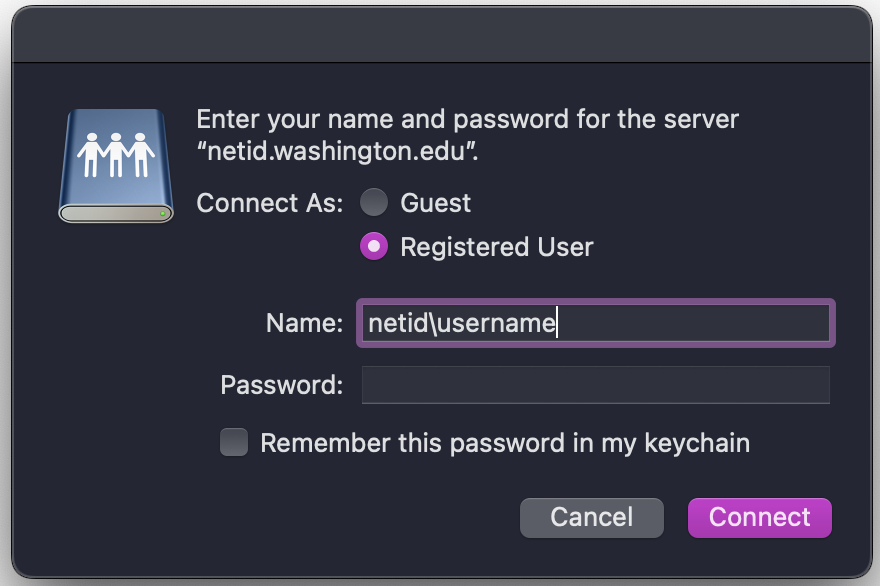
5. You will be prompted for credentials. For the name, enter your UW NetID in the form netid\<uwnetid> and then enter your NetID password. Click connect.
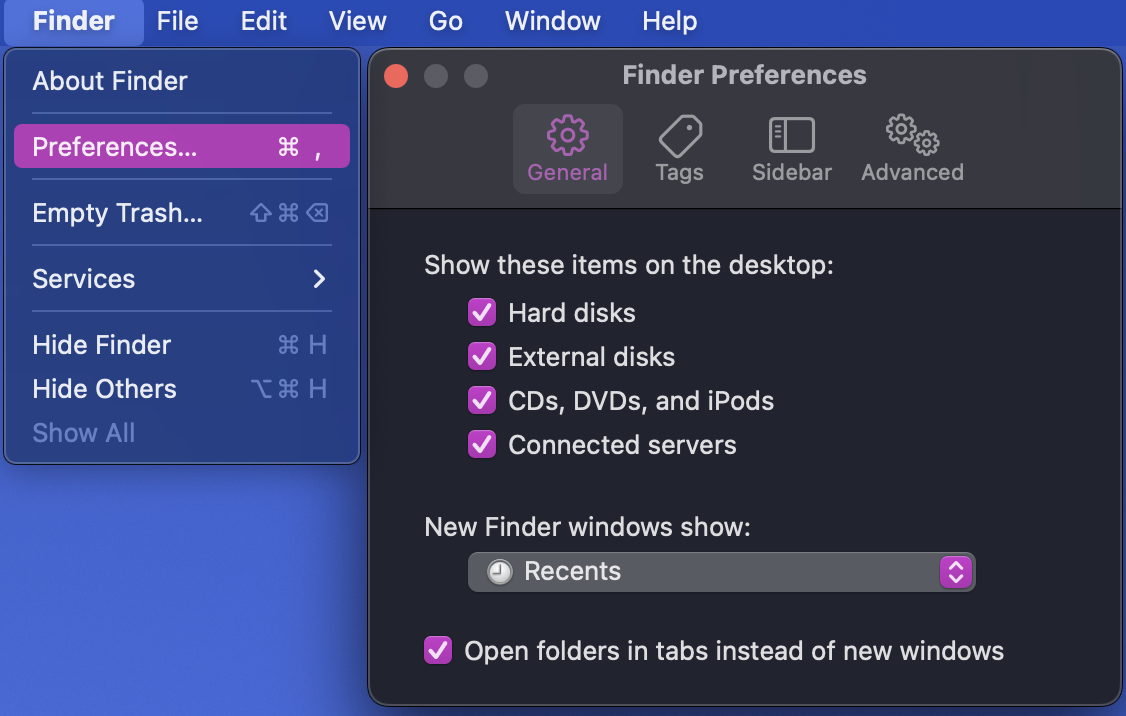
6. You will then be connected to the drive. If it doesn’t show up on your desktop, click on the desktop, go to Finder -> Preferences in the menubar, and ensure that “Connected Servers” is checked under “Show these items on the desktop:”.