You can integrate a UW Group as a LastPass Group for the purpose of controlling access to shared folders. This document describes how to do that.
On this page
- Requesting your first parent LastPass group
- Self-service group creation
- Important LastPass group limitations
- Future plans for LastPass groups
LastPass groups are a useful mechanism for controlling access to a shared folder. All UW LastPass groups are tied to UW Group Service groups.
You can use as many groups with a shared folder as needed, and use the same groups across shared folders. Changes to the linked UW groups will automatically flow to the LastPass group, you can add and revoke access to LastPass shared folders in this way.
Requesting your first “parent” LastPass group
You will get a parent group which any other LastPass group you need will logically be under. Once you have this parent group, you will be able to create groups under it on your own, and they will show up in LastPass without any assistance from UW-IT.
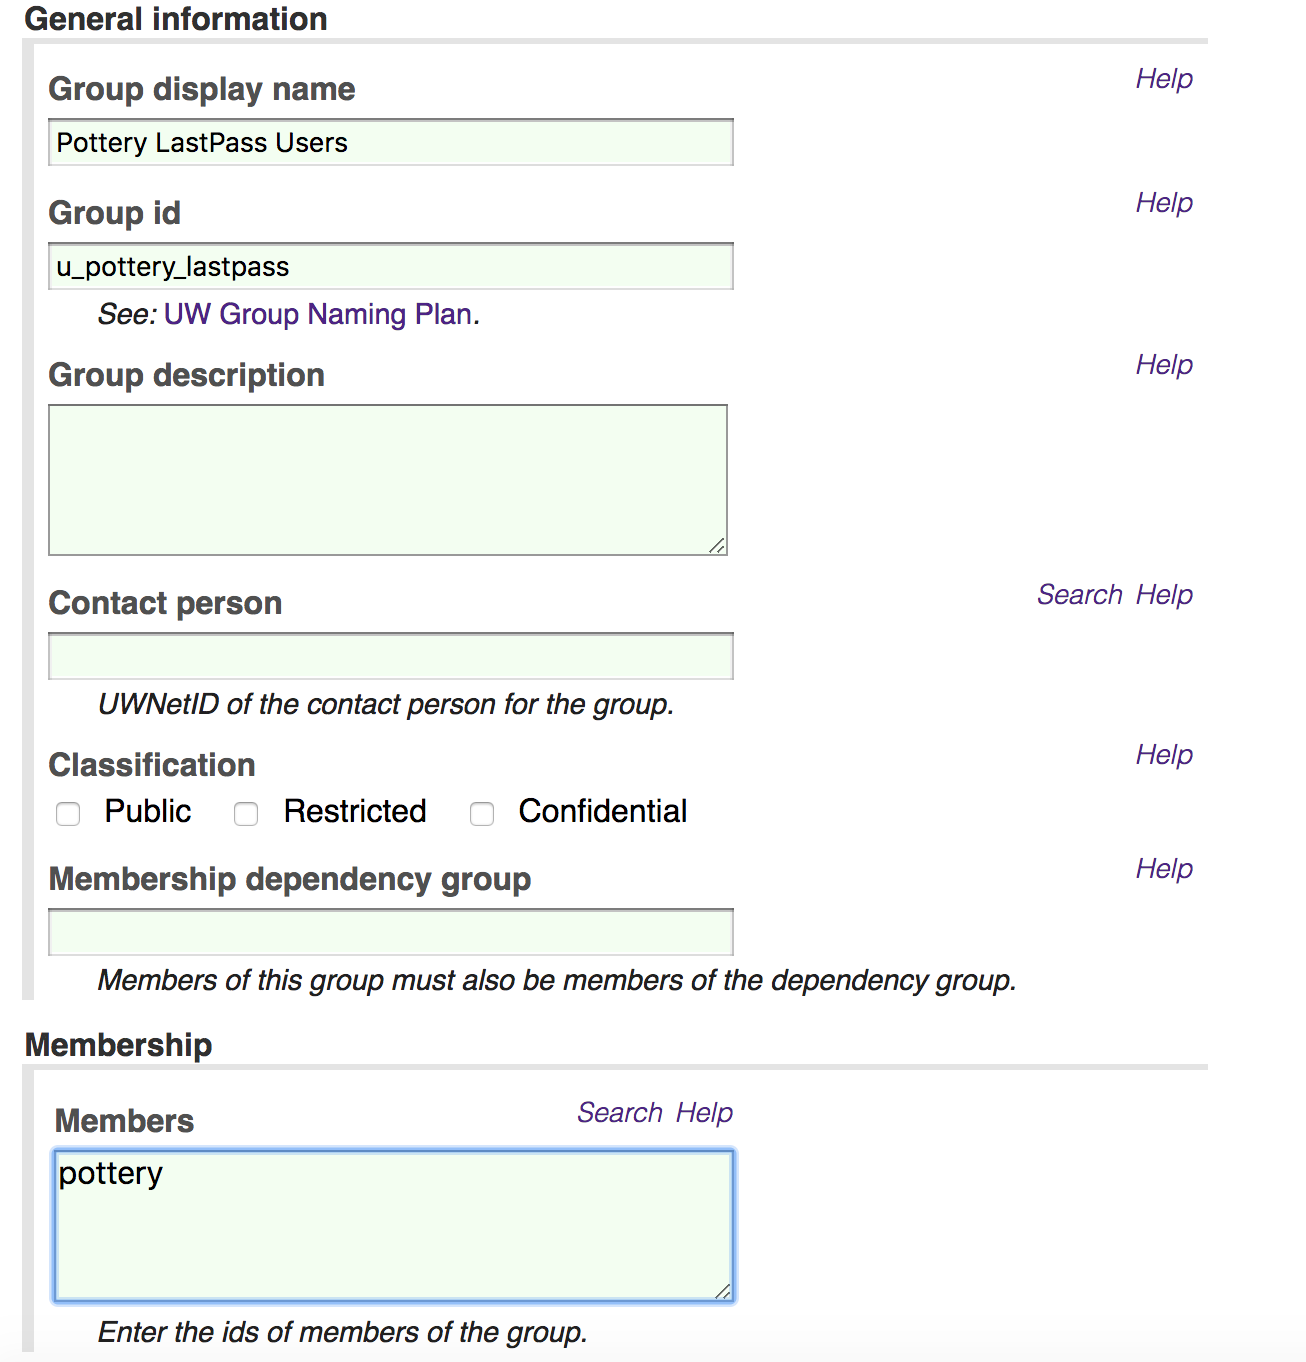
- You will want to create a new group specific to this purpose, and we recommend you put “lastpass” in the groupid, so that later, others will know exactly what these groups are used for (e.g. u_pottery_lastpass).

- Request UW-IT assistance in setting up your department’s first LastPass parent group. To do so, send an email to help@uw.edu with a subject line of “LastPass Parent Group: u_pottery_lastpass”, where <u_pottery_lastpass> is the group id of the UW Group service group you created in step #1.
Note: By default, we will allow anyone in the membership of the group you create in #1 to be able to do the self-service group creation steps detailed below. If that is not desired, you will need to communicate that in the request. - UW-IT will setup this initial parent group. Once setup, the group should appear in LastPass within 30 minutes.
Self-service group creation
You can only use these steps if your parent LastPass group has already been created AND you have been assigned the role of subgroup creator for the parent group.
If you want to re-use an existing group, create a new group and add the existing group to it as the only member.
To setup group sharing, follow these steps:
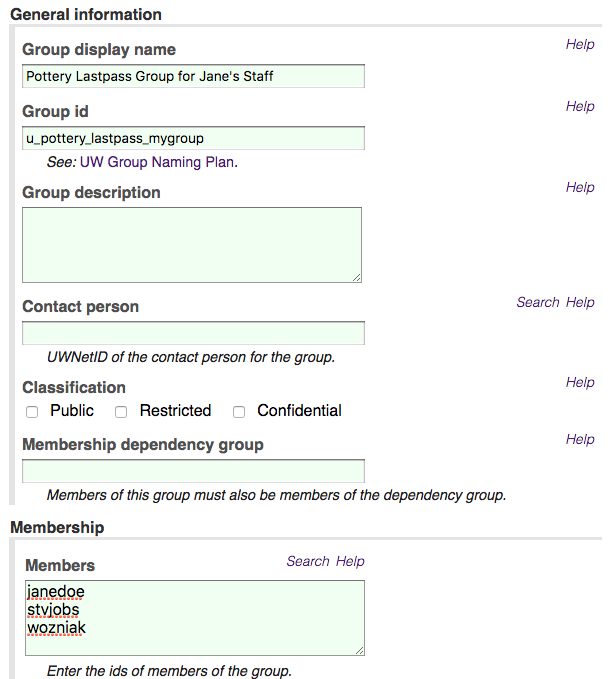
- Create a UW Group containing the users you would like to have access to a LastPass shared folder. Create a new group specific to this purpose which is logically under your department’s parent LastPass group. So if your department’s parent LastPass group is u_pottery_lastpass, you might create u_pottery_lastpass_mygroup
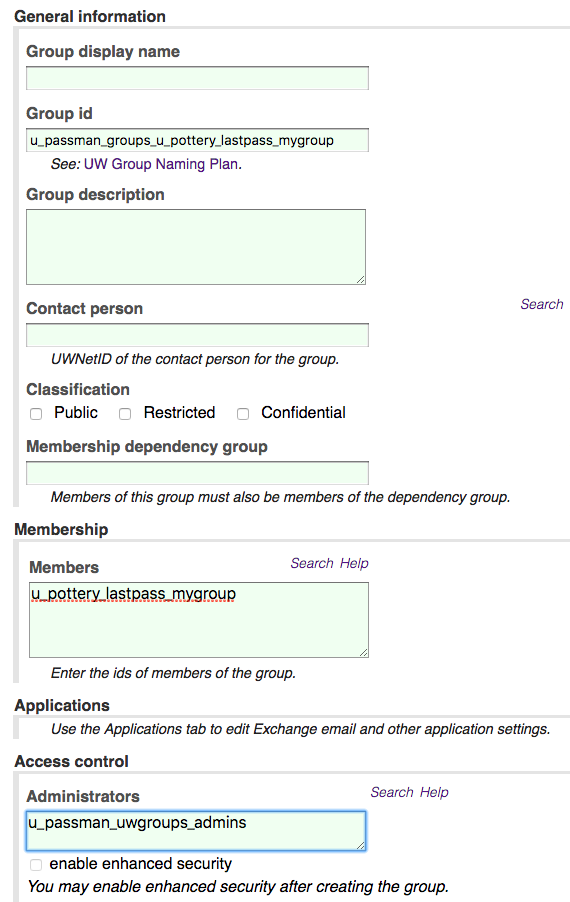
- Create a second group named u_passman_groups_<groupid> where <groupid> is the group created in Step 1. Using the example in step 1, that would be: u_passman_groups_u_pottery_lastpass_mygroup
- For the Group Administrator, use the following: u_passman_uwgroups_admins
- For the Group Membership, use the groupid created in Step 1
After the groups have been created in UW Groups, the group should appear in LastPass within 30 minutes.
You can find the groups listed in the Manage Shared Folder window, as shown below:
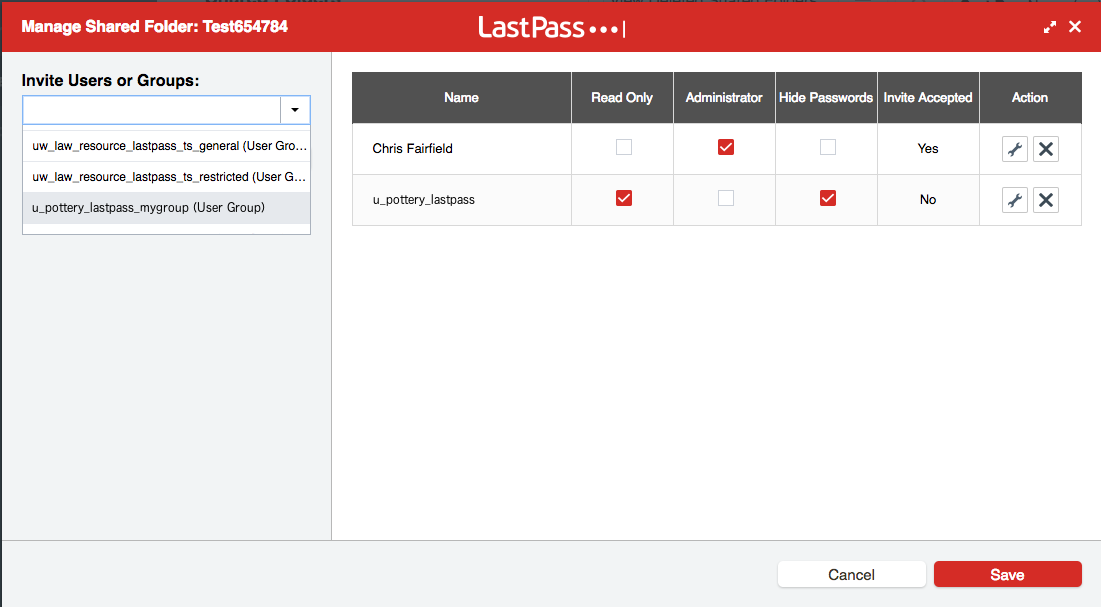
There is additional information from LastPass here regarding the specifics of the access granted by these sharing permissions.
Important LastPass Group Limitations
- After groups have been created under u_passman_groups, the group should appear in LastPass within 30 minutes.
- Users without a LastPass account that are in a UW Groups group will not be in the corresponding LastPass group
- Groups with no users who have a LastPass account will not show up; a group will only be synchronized if at least one user has a LastPass account
- If the group administrator of u_passman_uwgroups_admins is missing, the group will not be synchronized to LastPass
- Nested groups are flattened when synchronized to LastPass
Future plans for LastPass groups
UW-IT plans to improve our approach to supporting LastPass groups incrementally over time. We hope to make LastPass group creation less complicated and entirely self-service. This page will be updated as improvements are made.