How to Connect to a Managed Workstation (MWS) computer
Because Managed Workstation computers remain powered on at all times, your ability to use Remote Connect to connect to your computer is always available. If your computer is currently configured to go to sleep or turn off, those settings should be changed before attempting to connect to the computer.
Before you start
The following requirements are necessary to have a successful Remote Desktop Connect session:
- Have administrator privileges on your computer
- The computer must be turned on and not asleep when you try to connect to it
- Know the computer name of the computer that you need to connect to
- Use a VPN connection
- Use Microsoft Remote Desktop Connect
You need to have administrator privileges on your machine in order to connect to it remotely. If you are unsure if you are an administrator on your machine, follow these steps to check:
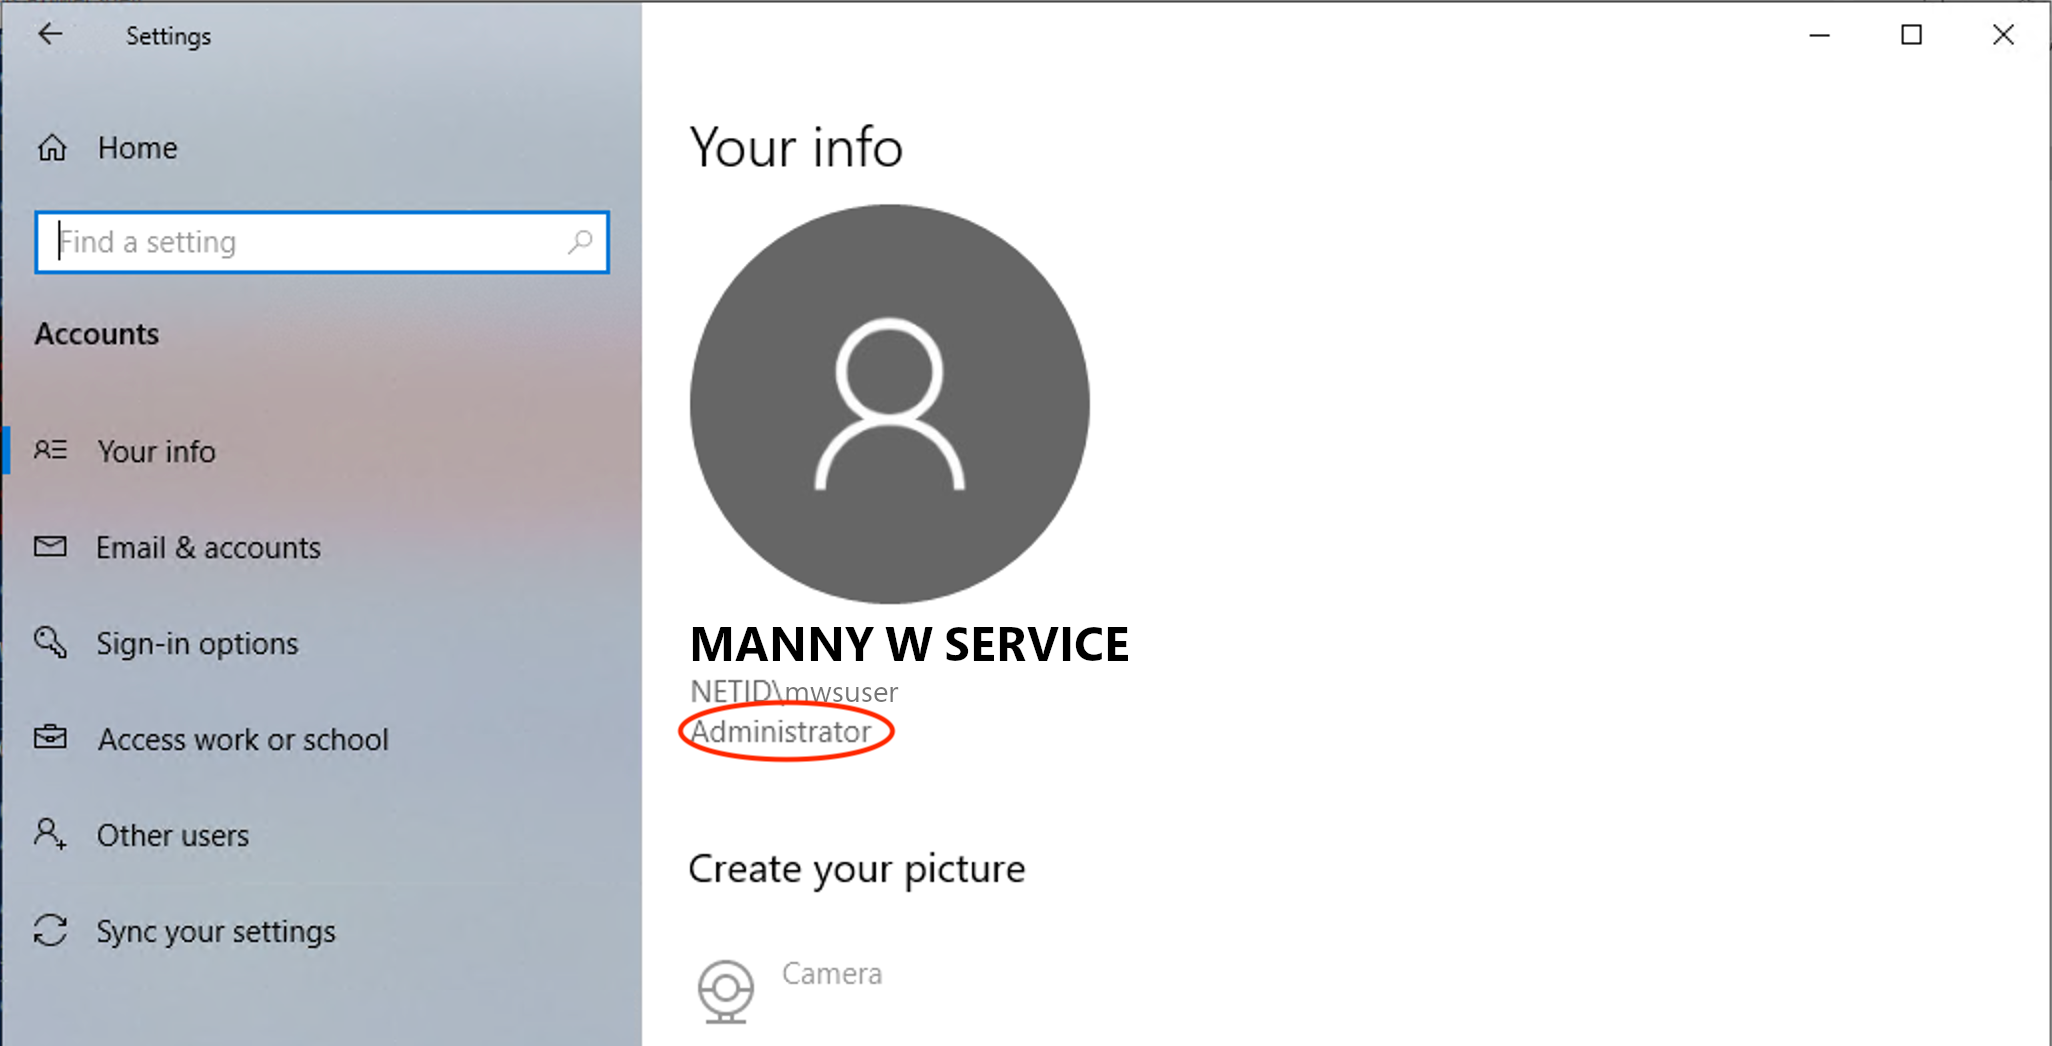
Checking if You Have Administrator Privileges
- Open the Settings pane by using the Win + I key shortcut or opening the Start Menu and clicking the Cog in the bottom-right corner of the menu.
- In Settings, go to “Accounts -> Your info”.
- If you are using an administrator account, you will see the word “Administrator” under your user name.
If you’re not an administrator, send a request to help@uw.edu, along with your computer name, to request that you be added.
Make sure that your computer is not set to automatically go to sleep. To do so, follow these steps:
Checking Your Power Settings
- Open the Settings pane by using the Win + I key shortcut or opening the Start Menu and clicking the Cog in the bottom-right corner of the menu.
- In Settings, go to “System -> Power & sleep”
- Change the “When plugged in, PC goes to sleep after” setting to never.
- When you leave for the day, make sure to leave your computer on.
To be able to connect to your Managed Workstation computer with Remote Desktop, you need to know the fully qualified name of the computer.
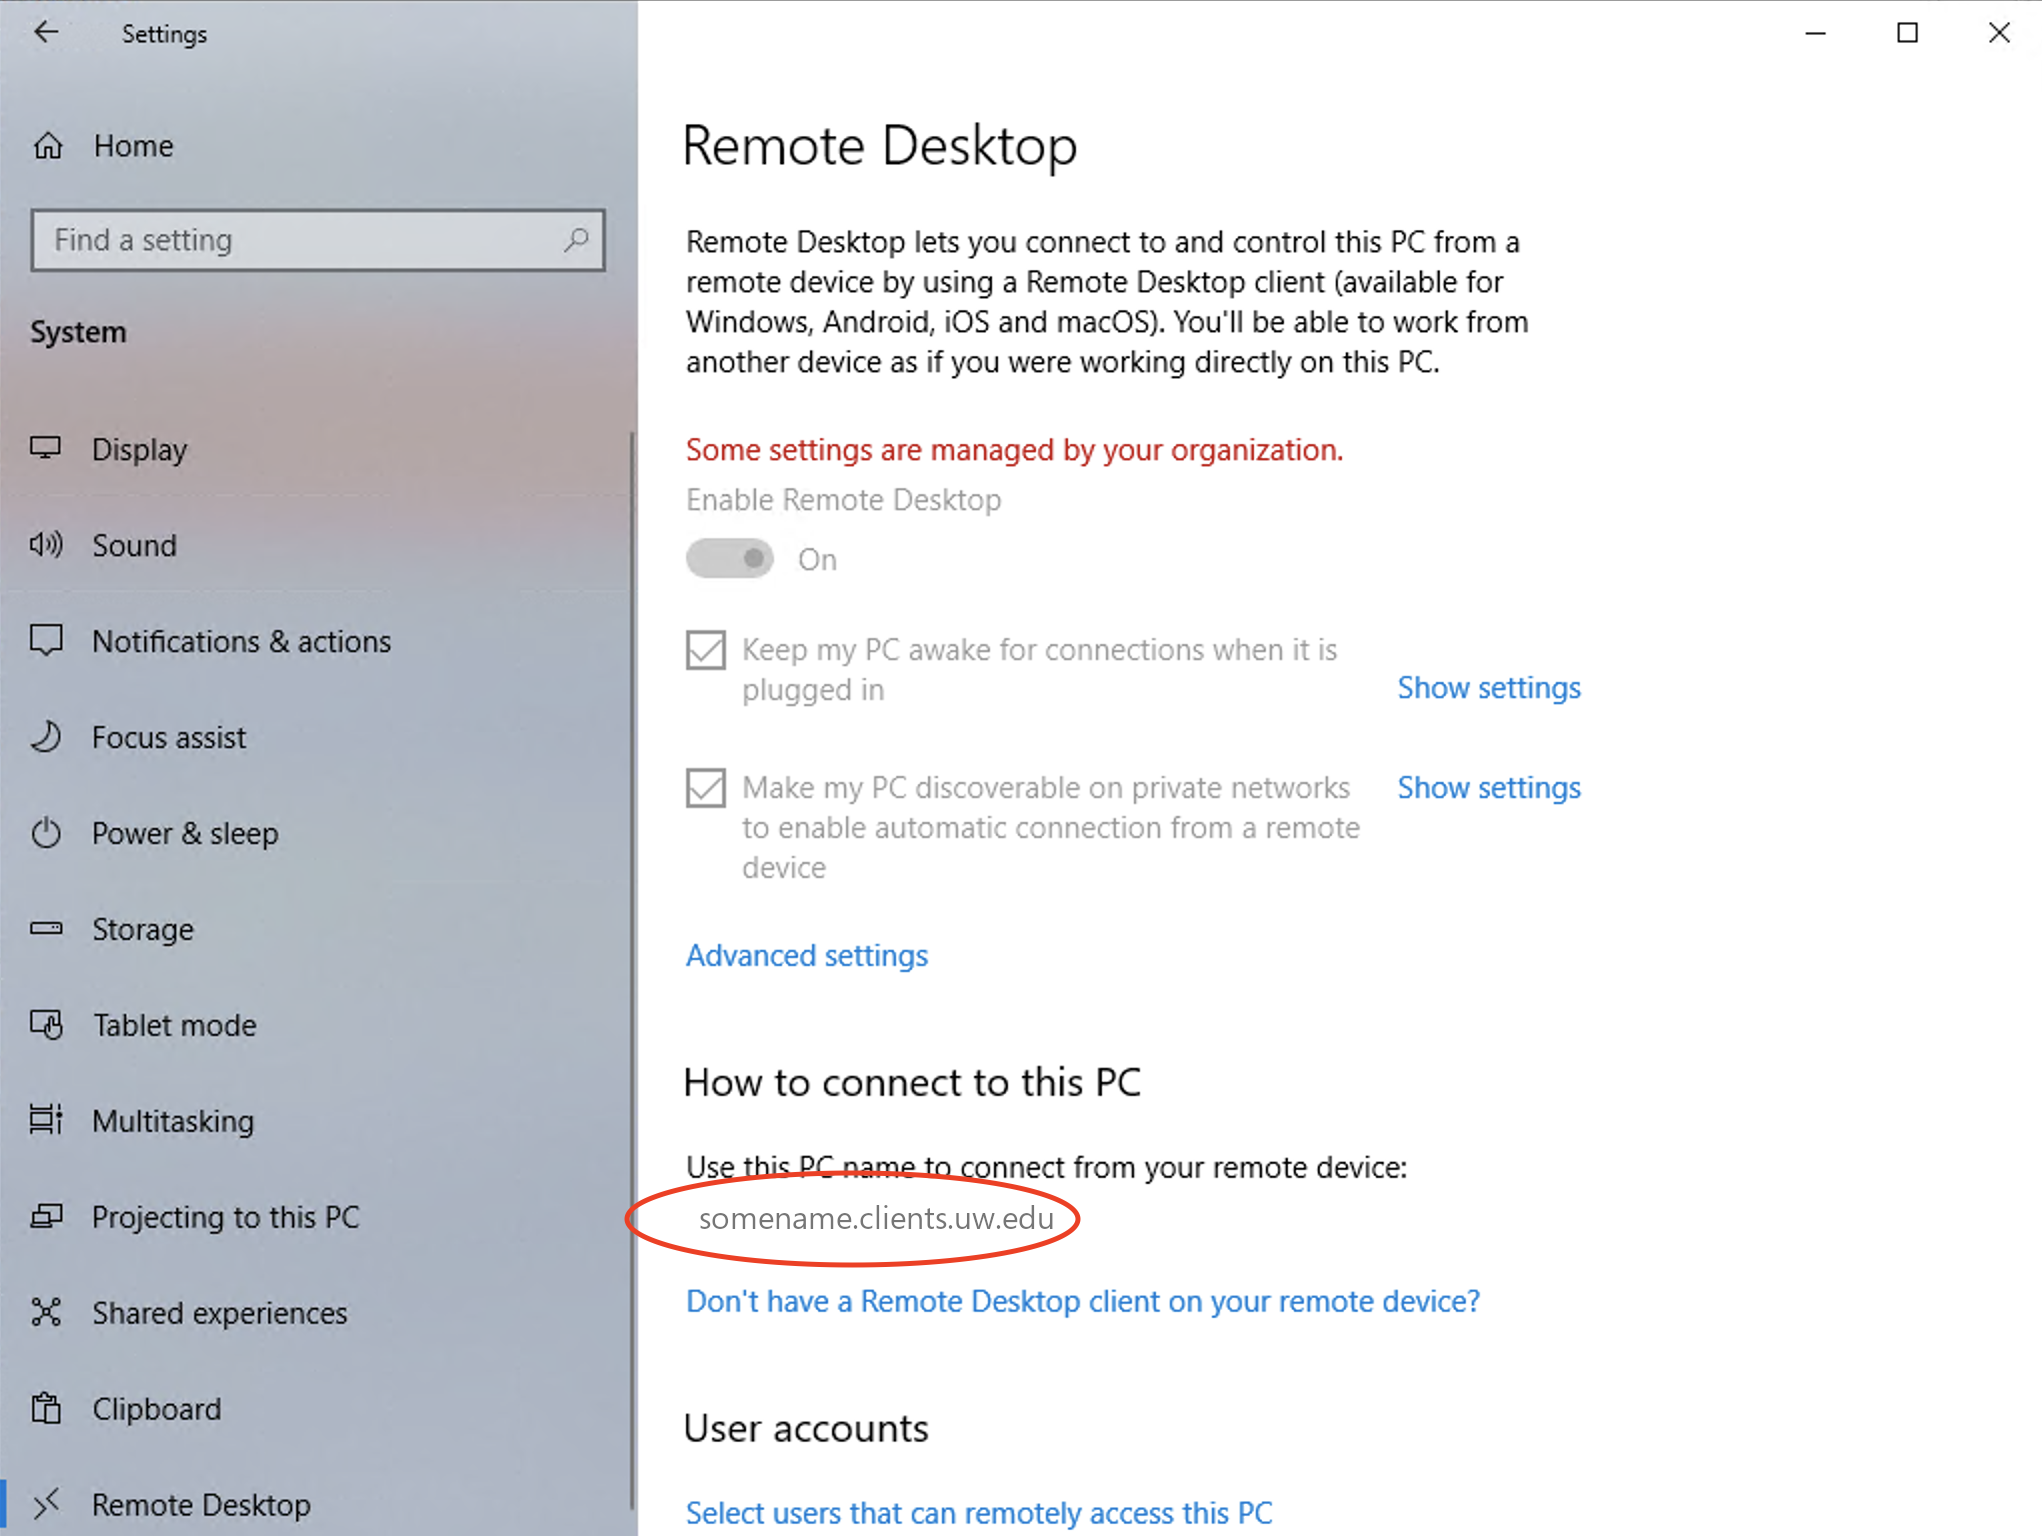
Finding the Computer Name
- Open the Settings pane by using the Win + I key shortcut or opening the Start Menu and clicking the Cog in the bottom-right corner of the menu.
- In Settings, go to “System -> Remote Desktop”.
- Under “How to connect to this PC” you should see “Use this PC Name to connect from your remote device” in this format: machineName.clients.uw.edu.
- Make a note of this name, you’ll use it when connecting to your machine later.
On the computer you are remoting FROM you will need to use a VPN to connect. There are 2 VPN options available to you:
- MWS VPN (Windows computers only)
- Husky OnNet VPN (Windows or Mac computers)
More information about how to setup and connect using those services can be found by clicking the links above.
Once you have established a VPN connection on your computer follow the instructions below on how to initiate a Remote Desktop Connect session to your computer
To open Remote Desktop (using Windows 7, 8.1, and 10) on the computer you are going FROM:
-
For Windows 10, type “Remote Desktop Connection” in the Search box next to the Start / Windows tile, and then click Remote Desktop Connection in the results.
-
In the Computer box, type the name of the computer that you want to connect TO, and then click Connect. The computer should appear as computer name.clients.uw.edu.

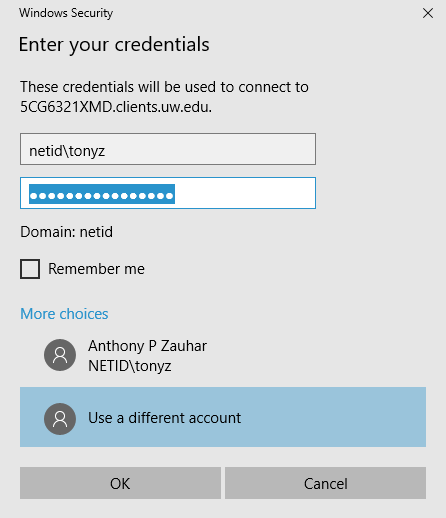
- Enter your UW Netid credentials.
- User name: netid\yourUW NetID
- Password: Enter your NetID Password
Remote desktop software is available for other operating systems:
- Microsoft Remote Desktop App for Mac (Microsoft)
- Unix client from the R desktop site
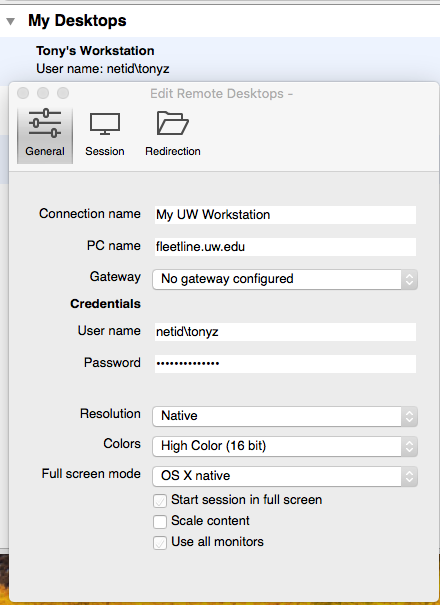
Using Microsoft Remote Desktop App for Mac
To establish a Remote Connection session, use the following steps:
- Open Microsoft Remote Desktop App (available from the App store for free)
- Click + New icon to create a new connection
- Connection Name: (Choose a name that’s meaningful to you)
- PC Name: YOURCOMPUTERNAME.clients.uw.edu
- Gateway: No gateway configured
- User name: NETID\yourUW NetID
- Password: Enter your NetID Password
- Recommended settings:
- Resolution: Native
- Colors: High Color 16 bit.
- Full screen mode: OS X Native
- Other settings as you prefer.
Under Session you can connect to your printers and choose how sound is played from your remote computer
- Click the red X to close and save.
To Start a Remote Desktop Connection:
- Highlight the connection you just made.
- Click the -> Start button to connect.
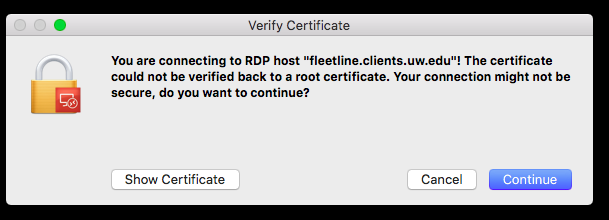
- If you should see the certificate warning below, click Continue.
- Note: You can permanently remember the certificate by clicking “Show Certificate” and then checking the box for “Always trust…”