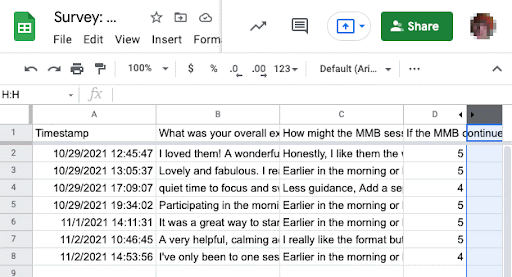
UW Google Forms can be used to build surveys that are easy to create and share. You can view survey responses within the Form or, if you prefer a more data-friendly format, Google Sheets.
Features of Google Forms include:
- Questionnaire options that are simple to understand and allow for higher complexity forms/surveys
- Useful data about response details
- Support for multilingual options
- Ability to preview surveys in desktop and mobile views
Note: UW Google Forms does not support the use of UW Groups. If you need to limit the survey recipients to specific people, you must use Microsoft Forms.
Important: Due to coming changes to Google Workspace — including personal UW Google account storage quotas, the use of UW Google with Shared UW NetIDs, and the availability of Google Shared Drives — we encourage people to explore Microsoft Forms for creating surveys. UW Google Forms is currently a viable option, but because UW-IT cannot guarantee long-term availability of the use of Shared UW NetIDs with Google apps, you should consider your options carefully, in particular when planning to collect team or departmental data that you anticipate retaining for a long time.
Getting Started
If you’re familiar with Google Apps, you can start by checking out Google’s online documentation for using Forms. If you would like a bit of help first, see the how-tos below.
Create a survey using UW Google Forms
You can create a survey from any of three different starting points:
UW Google Drive
To create a survey from UW Google Drive:
- Go to UW Google Drive.
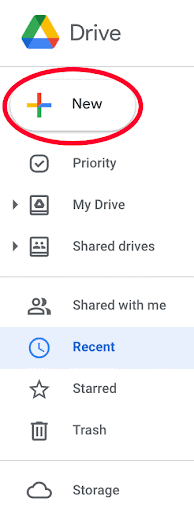
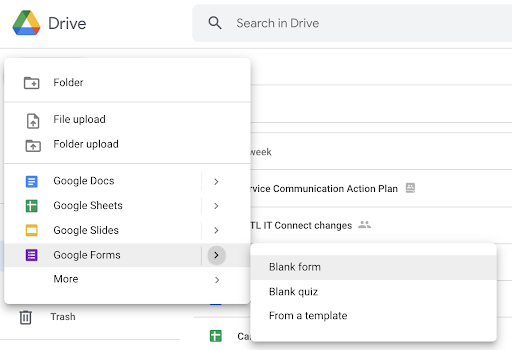
- Above the left sidebar, click +New, then scroll down to Google Forms, hover over the carat (>), and click Blank form.
A new blank form will appear:
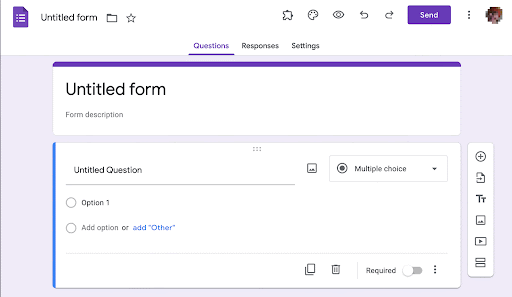
- To name the survey, double-click Untitled form and enter a new title.
- Choose a question type from the dropdown menu.
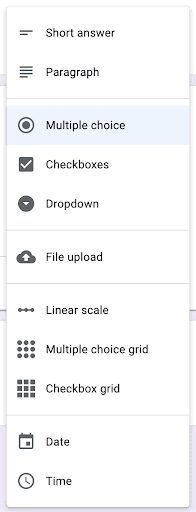
- To add more questions, click the plus sign at the top of the tool bar on the right side of the screen.
- Note: To require responses to a question, toggle the Required setting near the bottom right of the question dialog box.

- Note: To require responses to a question, toggle the Required setting near the bottom right of the question dialog box.
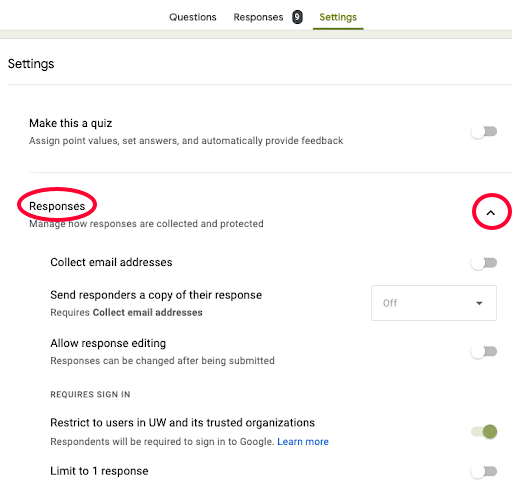
- When you are finished adding questions, go to Settings. Click the carat (^) to open the Responses area and select the options you want.
- Notes:
- If you turn on Collect email addresses, the survey will not be anonymous.
- To limit the survey to people with a UW NetID, make sure that the Restrict to users in UW and its trusted organizations setting is turned on.
- Notes:
- When you are ready to send your survey, in the upper right corner, click the purple Send button. A dialog box will appear:
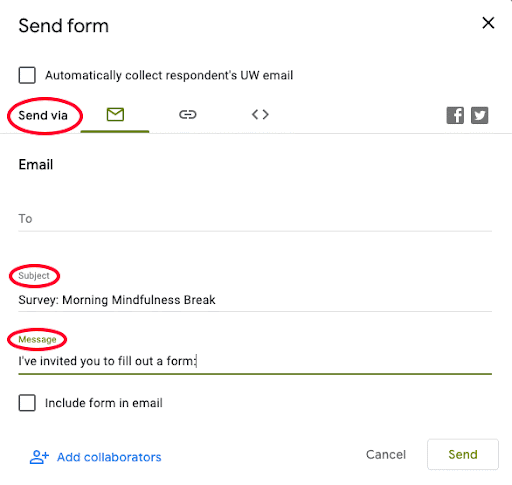
In this interface, you can choose the method for sending the survey: via email, by getting and sharing a link directly to the survey, or by embedding the form in a web page, such as a page in Canvas course. If you send via email, you can add a subject line and a customized message to accompany the survey. To send via email, you can enter email addresses manually or copy and paste a list of email addresses.
UW Google Forms (via the waffle)
To create a survey via the waffle:
- Go to UW Google Drive.
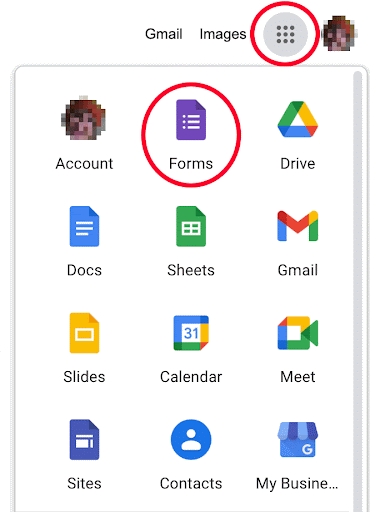
- In the upper right corner, click the icon with nine dots (aka waffle). A list of Google apps will appear.
- From the list of Google apps, click the purple Forms icon.
- On the next screen, you can explore templates or click the multi-colored plus sign to start a new, blank form for your survey.

- From here follow the previous procedure beginning at Step 3.
UW Google Sheets (via Drive or waffle)
If you’re comfortable and familiar with Google Sheets, and/or if you anticipate that your survey will yield a volume of data that would be easier to view in a spreadsheet, you may want to start there to create your survey. You can create your survey by inserting a form in UW Google Sheets.
- Go to UW Google Drive.
- From either Google Drive or Google waffle, open Google Sheets.
- Either create a new sheet or select an existing sheet.
- In the new Sheet, click the Insert menu, and then click Form.
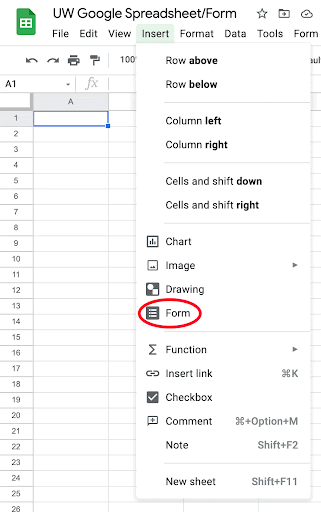
- A new blank form will appear.
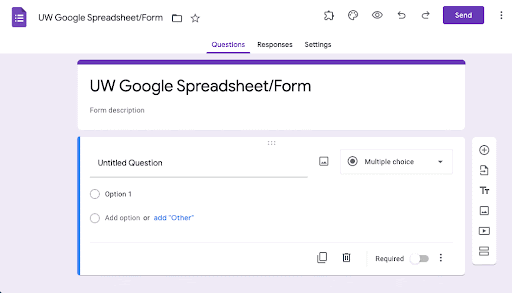
- From here follow the earlier procedure beginning at Step 3.
View Survey Responses
Whichever starting point you choose to create a survey, you can view survey responses in either the Google Form or the Google Sheet.
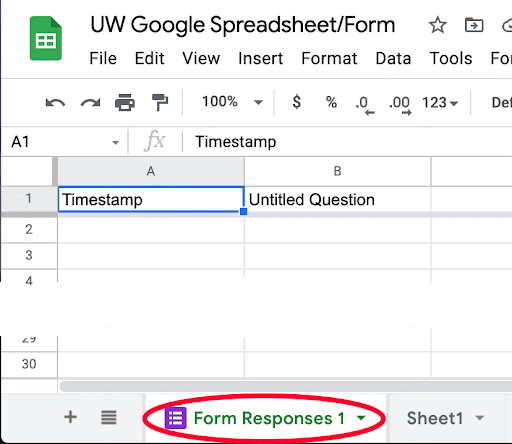
In the Google Sheet, survey responses appear on the tab named Form Responses (default name). This view is useful when working with large amounts of data.
Responses in the form are shown in a graphical interface:
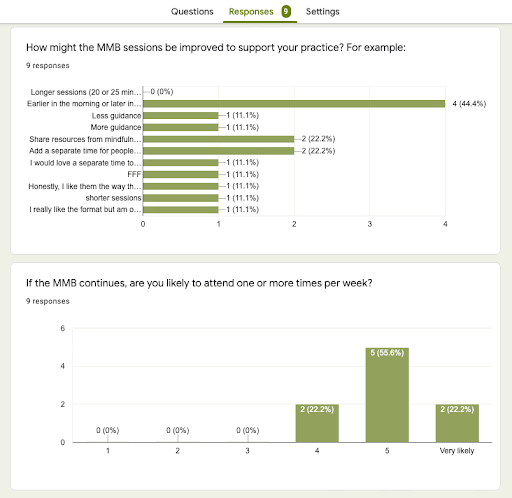
To move from the form to the sheet, on the Responses tab, click the green Sheets icon.
![]()
