Introduction to Ableton Live
Starting Out With Ableton Live
Ableton is a multi-platform DAW (Digital Audio Workstation) that includes a suite of effects, samplers, sequencers, and synthesizers. It includes all the tools and functions necessary to create original compositions from scratch. While it comes at a fairly steep price tag, it is by far one of the best solutions for performing and programming original compositions on the fly in a live performance setting.
Transport
It is important in any DAW (Digital Audio Workstation) to first know where your transport controls are located. Transport controls are basic functions such as PLAY, STOP, RECORD, and TEMPO.
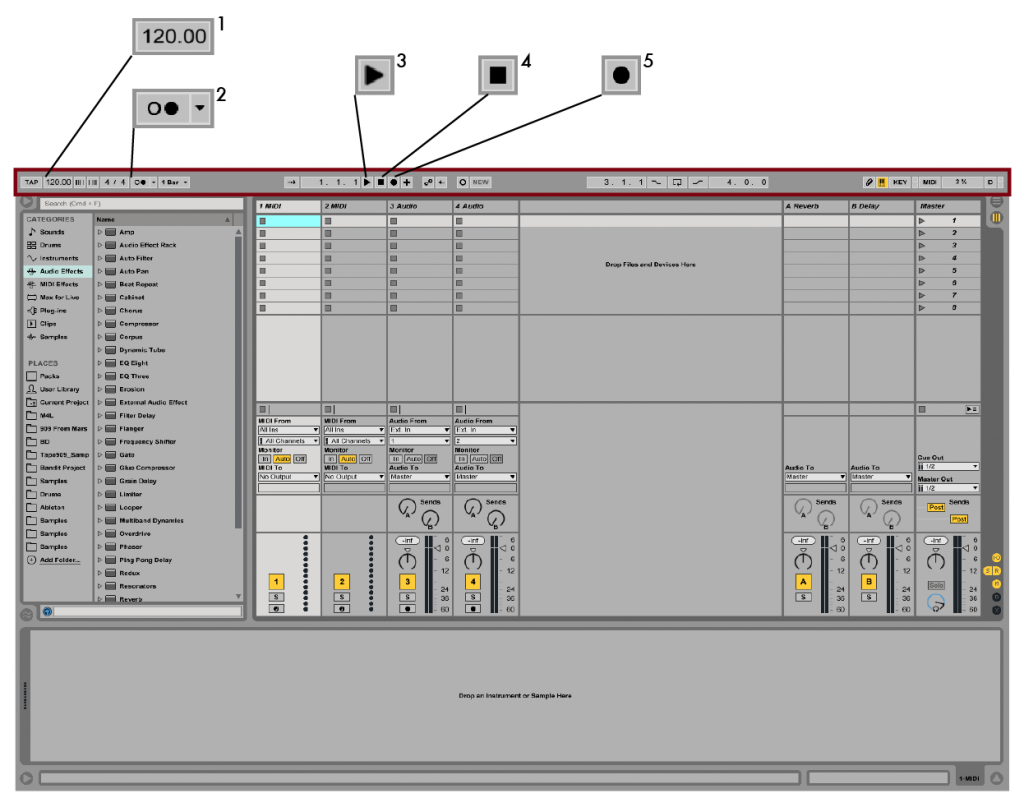
This is the default layout when you open Ableton Live 9. Your transport controls are all conveniently located across the top of the screen.
1. Tempo: the beats per minute (BPM), or speed of the project
2. Metronome: click to turn the metronome on or off
3. Play: press the spacebar to play your project
4. Stop: press the spacebar again to stop your project
5. Record: click to record your sound source
Before we proceed, take this time now to name and save your project (File>Save Live Set As, or Command+S), to prevent yourself from losing all of your work in the event of a program crash or error.
Tracks
By default, Ableton opens with 2 audio tracks, 2 MIDI tracks, 2 Auxiliary channels, and a Master channel. For now, just focus on the 2 audio and MIDI tracks. Each track has its own set of controls, the most elementary ones being Volume, Pan, Track On/Off, and Solo.
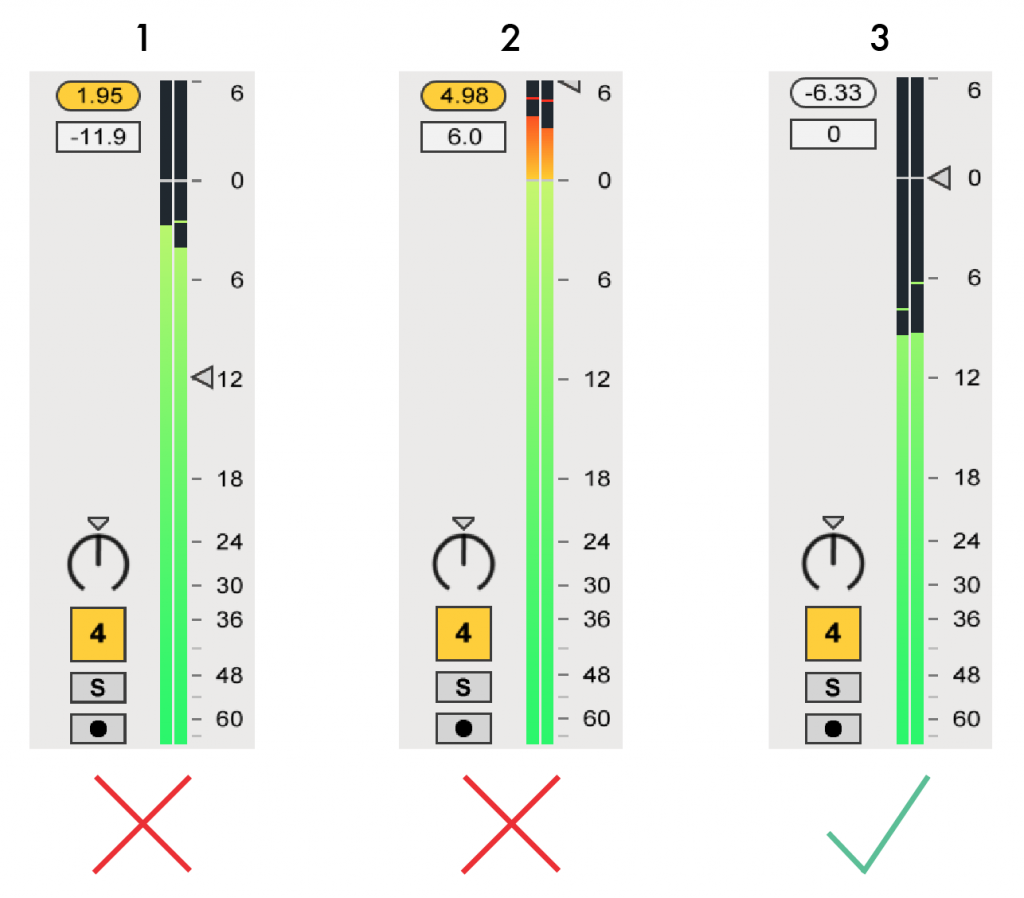
Volume: controls the gain, or ‘loudness’ of the track. Move the slider up to increase volume and down to decrease. When audio is playing through a channel, the meters will fill with color (green-yellow-red) to indicate the level of the source. However, it is of critical importance to understand that there are rules of dealing with gain and volume levels (called proper “gain staging”) in order to maintain the highest level of audio quality. As a rule, you never want the audio to surpass “0” on the meter reading – “0” indicates the maximum gain of a channel before the audio will start to clip, distorting and degrading the quality of the audio.
1. Even though the meter reading (indicated by the top of the green bars) does not surpass “0” on the scale, you can see that it is actually above the slider (i.e. the little triangle on the right side of the meter). Although though distortion may not be audible or obvious, this is still bad practice and inevitably degrades the overall quality of your audio, as you no longer have any more headroom. The concept of headroom will be explained later.
2. Clipping is indicated in a channel meter when the color turns from green to red. This shows a channel that is clipping.
3. This is what proper gain staging in your channel looks like. There is no clipping, and the meter reading is below the slider, giving your channel plenty of headroom.
Never ever go against these principals of gain staging if you need it to be louder in the studio. You can always increase the volume of what’s coming out of the speakers via the volume control on the audio interface. It is also tempting to increase your gain too much in an attempt to bring your song to the same volume as a commercial recording – just know that this is NOT achieved during the recording and composition process, but rather done in a separate process called mastering. Techniques of mastering will be covered at a later time.
Pan: This controls the left-right balance of the track – how much the sound comes out of the right speaker versus the left speaker.
On/Off: This is the same as the “mute” function in other DAWs. When you click the On/Off button, it mutes the channel and the button turns from yellow to gray. Click it again and the track will become un-muted and the button will turn back to yellow.
Solo: when clicked, this button turns blue and only the audio from the solo’d track will play.
Recording Audio
Now that you are starting to understand the basic functions of Ableton, we will start to take a look into how to record.
Session View
Unlike other DAWs, Ableton does not immediately open to a linear timeline. It first opens up to its unique feature called “session view.” The layout is untraditional, but in terms of composition and recording, think of session view as a sketchpad to record loops, drafts, and ideas in MIDI and audio before putting your final composition onto a linear timeline. Session View is also the basis of Live’s adeptness for live performance – you have the ability to play, stop, and record any loop of audio or midi data whenever you want, making it especially ideal for performance of loop-based electronic music.
Arrangement View
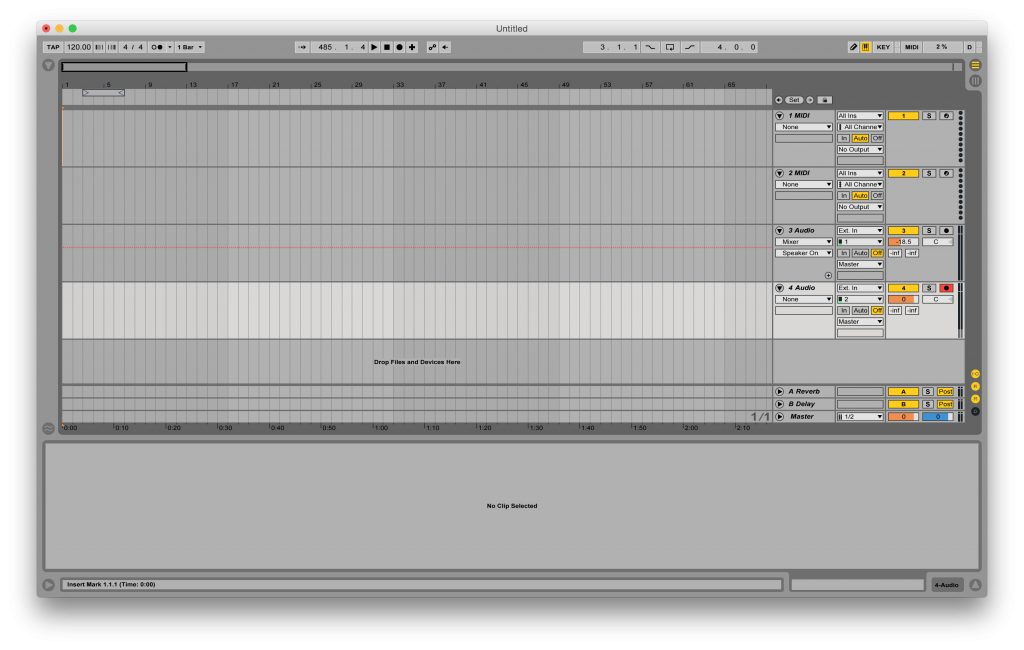
When you are ready to record your audio as a final take onto an audio timeline, hit TAB to go to the Arrangement View.
Now you see your typical linear timeline. To record a channel:
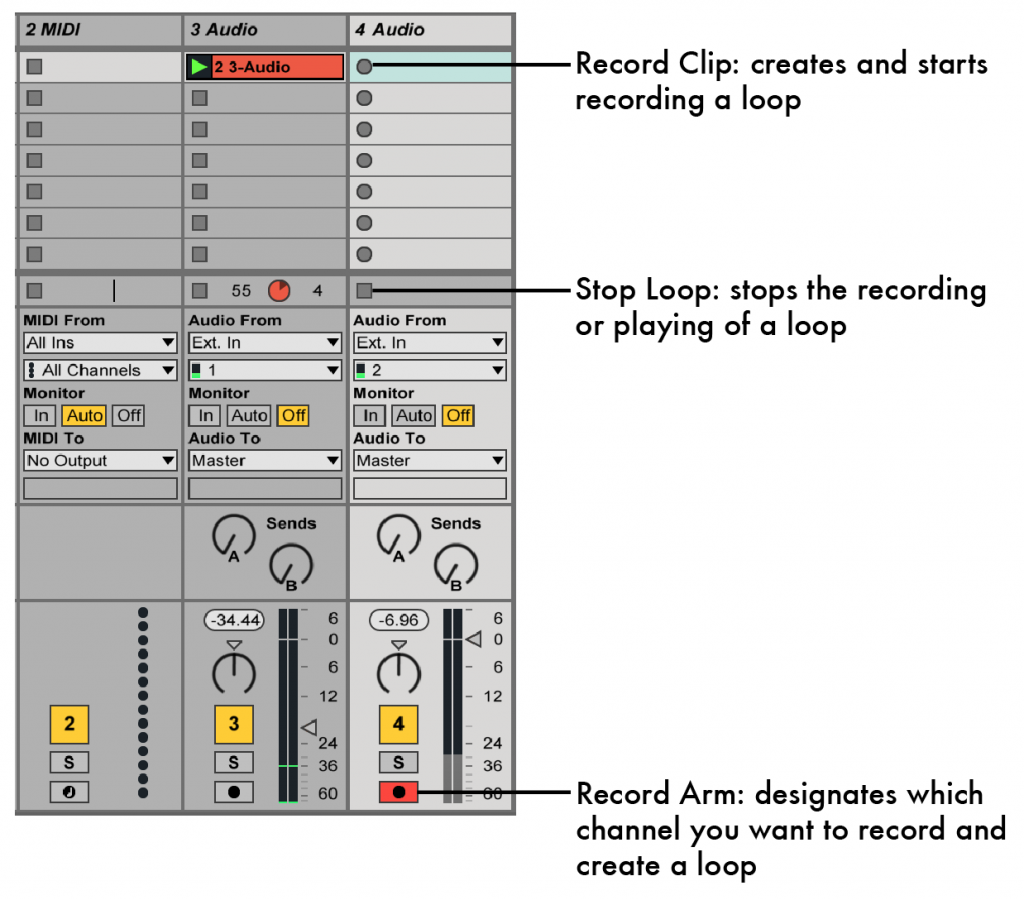
1. Arm your desired channel to record. The arm button is now located on the right side of the screen. Make sure it is highlighted red
2. Click the record button located at the top of the screen in your transport controls
3. There will be a metronome count-in of 1 bar (4 clicks) before recording starts. You can change the count-in duration via the drop-down menu next to the metronome button
4. When you are done, press spacebar to stop recording
Save/Export
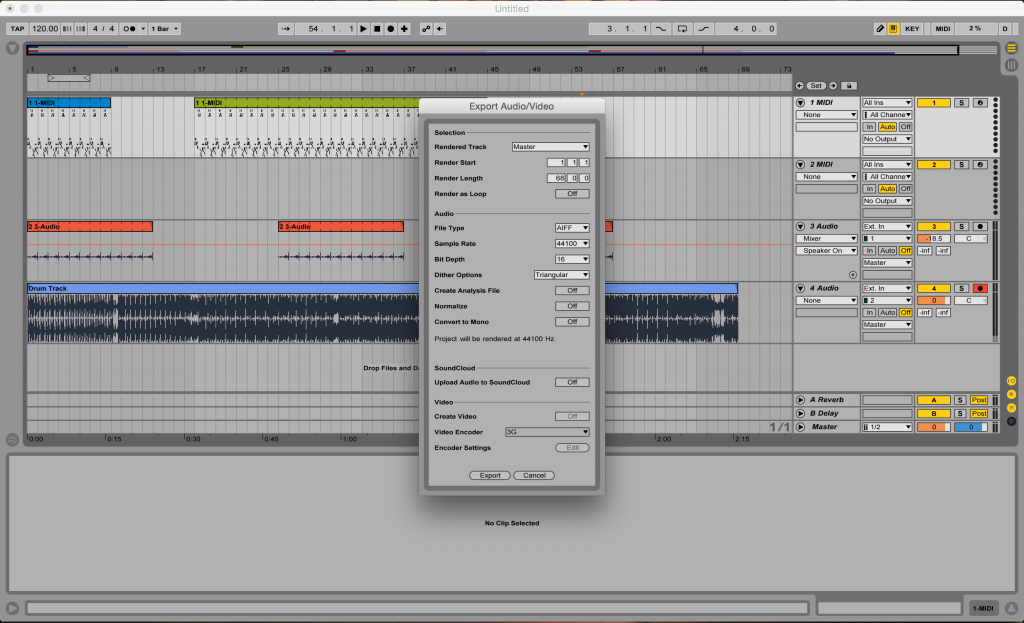
It is natural to confuse saving with exporting. Saving in Ableton only saves the information in your project into a file type (.als) that only Ableton can read. Exporting renders your composition into a lossless audio file (WAV or AIFF) that can be played back by all standard audio playback software. Once your are finished recording all your tracks and are happy with your arrangement, you want to save the final project and export it into an audio file format.
Follow these steps:
1. Save the final project (Command+S)
2. Make sure nothing in your project is individually highlighted. To unhighlight all, just click in a blank space on the timeline in arrangement view
3. Export either by File>Export Audio or Command+Shift+R
4. For casual listening purposes, you can leave the export settings as their defaults. However, if you plan on using your audio for commercial purposes or will import it into another software (e.g. film scoring), you want to change the bit depth from 16 to 24. You can choose whether you want to export to AIFF or WAV, depending on your preference
5. Click Export, choose your file name and destination, and you are done!

