- Overview
- Accessing Schedule Builder
- Planned Courses
- Section Filters
- Exclude Days and Times
- Add to Plan
- Pin Your Schedule
- Register by Choosing a Schedule Directly
- Troubleshooting Schedule Builder
Overview
Schedule Builder is a MyPlan feature that helps you with course schedule planning. It provides a visual calendar that allows you to see up to 25 possible schedules. You can select which courses and sections will best fit your calendar for the upcoming quarter.
You can pin schedules and save them for later. When it is time to register, you can refer to your pinned schedules for easy access to course and section information. Once you have your final schedule, you can easily send courses to registration.
Accessing Schedule Builder
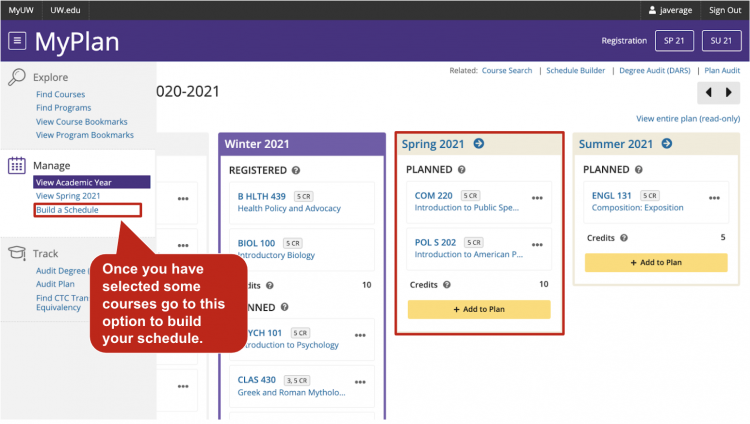
To access Schedule Builder, log on to MyPlan or go through the MyPlan link on MyUW. Once you have logged on, go to the Academic Year View.
To use the Schedule Builder feature, you will need to have some courses in your plan for the upcoming quarters that have a published time schedule. If you don’t have any courses in your plan, you will need to add some first. For our example, we will add COM 220 and POLS 202 to our course plan.
To find out more about how to search for courses, review the Find Courses guide.
Once you have courses in your plan, select Build Your Schedule in the navigation bar at the top of the screen.
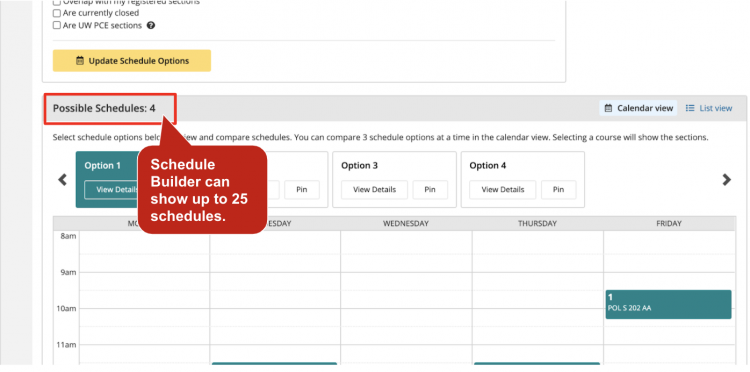
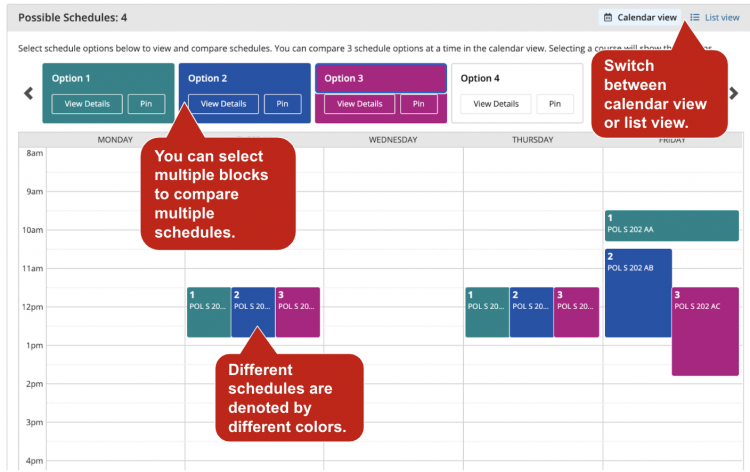
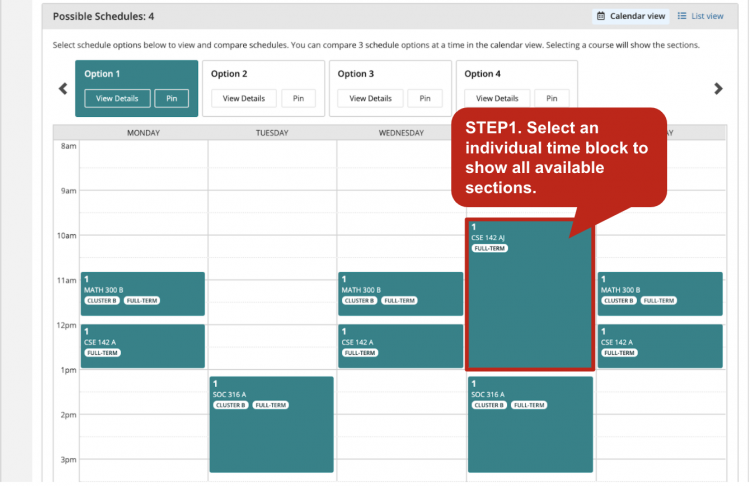
Schedule Builder can create up to 25 possible schedules to view. Selecting a calendar block displays schedule details. You can compare different schedules by selecting one of the blocks under the section “Possible Schedules.”
Different schedules are denoted by different colors. You can display up to three possible schedules at a time in the calendar grid. If you want to select another schedule, you’ll first have to deselect one of the three schedules that are currently displayed.
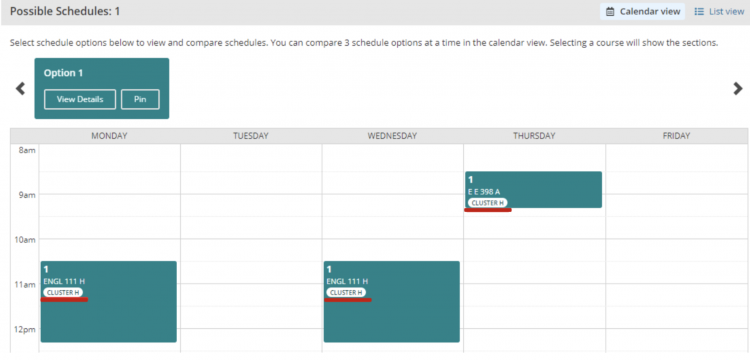
Planned sections or courses that are clustered together (Cluster and FIG courses) will show in Schedule Builder. Adding these clustered courses and FIG sections from the Course Details Page will automatically group all courses in that cluster to your plan. Please note that schedule builder is currently not optimized to compare multiple FIG clusters at the same time.
Planned Courses
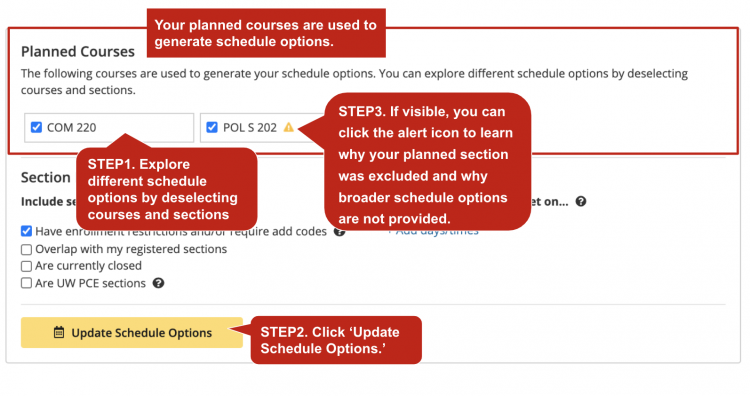
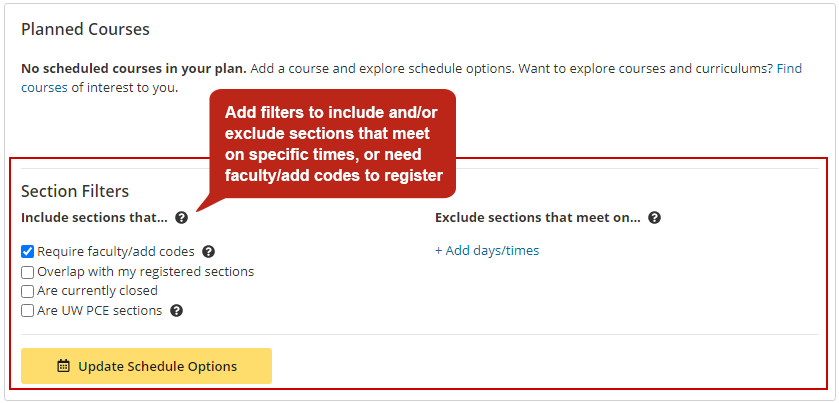
The Planned Courses section displays all of the courses included in your current planned items. You may generate different schedule options by deselecting specific courses and sections. Schedule Builder can also create schedule options for courses with special or irregular meeting times (eg. courses that allow duplicate enrollment).
Section Filters
On the Schedule Builder page, you will see an area titled “Include Sections that” with a default option selected. This default option ensures that Schedule Builder will only return open sections, those that require faculty/add codes and/or independent study sections, and those that do not conflict with your current registered courses. Schedule Builder excludes sections that are currently closed or overlap with courses you are already registered for. You can change these options by checking the boxes “Are currently closed” and “Overlap with my registered courses” respectively. If there is a course with enrollment restrictions and/or add codes that you want to take, speak to your adviser to learn more about how you can do so. If you want to know more about enrolling in a Professional and Continuing Education (PCE) course, visit the PCE website. To view your changes, select the Update Schedule Options button.
Exclude Days and Times
You can also exclude sections that meet on days or times that conflict with your other activities by selecting Add days/times under “Exclude sections that meet on” in the center of the screen.
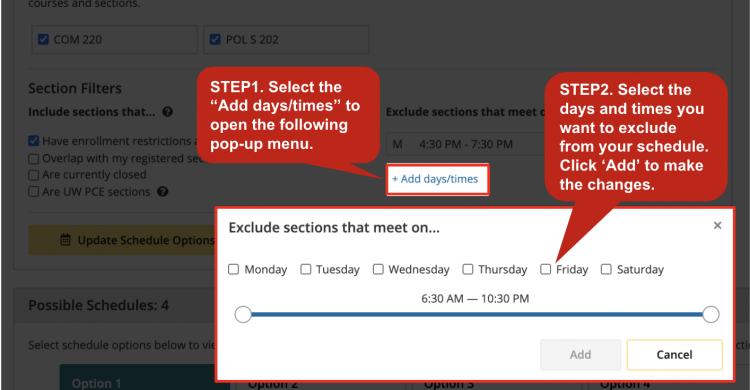
- Select Add days/times to open a pop-up menu.
- Select the day(s) and adjust the slider bar to choose the times you would like to exclude from your schedule. Select Add. If you want to edit or delete, select Edit/Delete.
Add to Plan
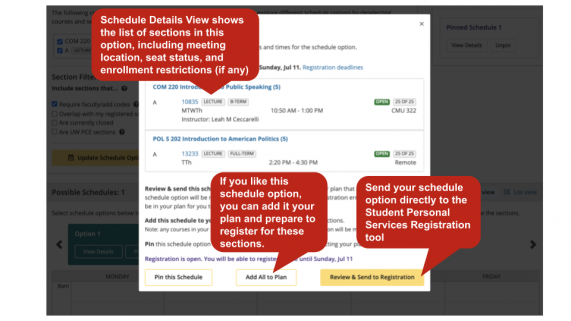
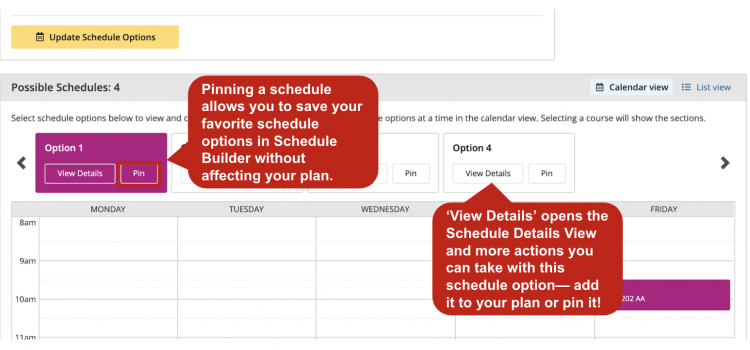
Select ‘View Details’ (which leads to Schedule Details View) on a schedule option to see section level details and check if a course section is currently available or has enrollment restrictions. To add all courses of an entire schedule option, select the “Add All to Plan” button.
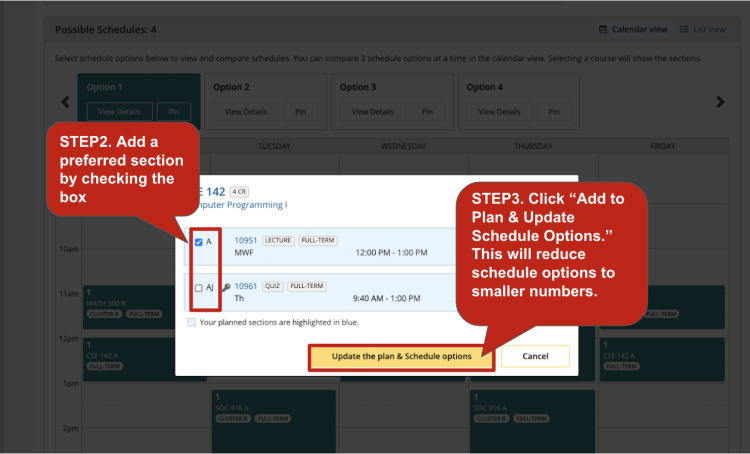
To add only a specific section, select an individual calendar block, check your preferred section, and click “Add to Plan & Update Schedule Options.”
Important Note: You still need to register after adding the schedule to plan. Do this by navigating to the current quarter, and clicking the Send to Registration button.
Pin Your Schedule
- You can save a possible schedule by selecting the Pin button on your preferred schedule option block on the top of the calendar.
- Once you have selected the schedule you want, your pinned schedule will appear in the rightmost corner of you screen under the “Pinned Schedules” block. You can pin up to 3 schedule options for future planning. You can also select click the X to delete the pinned schedule. You can send your courses to registration by selecting the View Details button below the pinned schedule, adding it to your plan, navigating to the current quarter, and clicking the Send to Registration button.
Register by Choosing a Schedule Directly
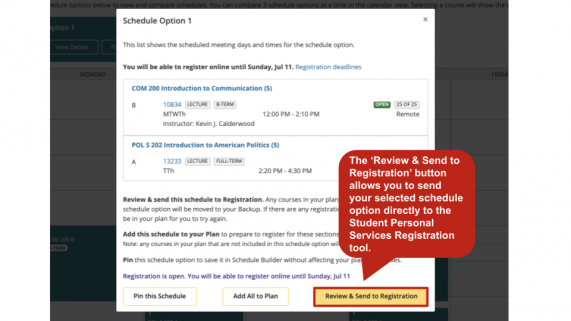
If you have already selected the schedule option you want, you can save your plan by clicking on the View Details button in your pinned schedules. Alternate section options will display for sections occurring at the same time and may be selected before adding the sections to plan.
If you’re ready to register, use the “Review & Send to Registration” button to send the selected schedule to the Registration tool. If there are any registration errors, those sections will be back in your plan for you to try again.
Schedule Builder shows registered sections when there are no planned sections. When students successfully complete the registrations, their planned sections become registered sections in MyPlan and show up in the Schedule Builder.
Troubleshooting Schedule Builder
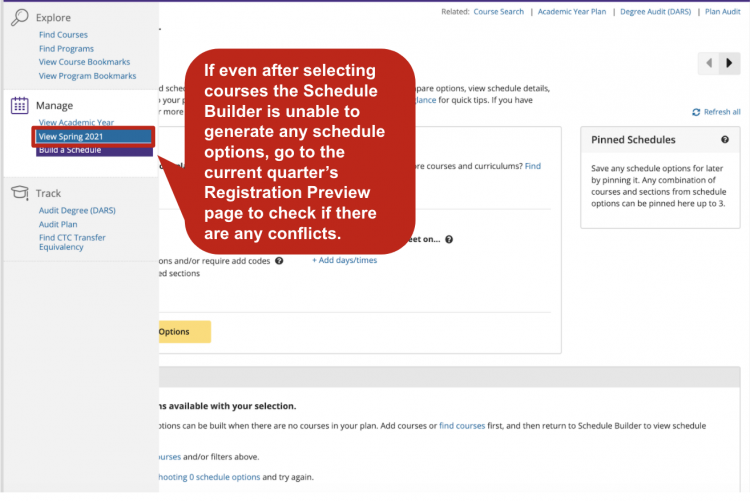
Troubleshooting 0 Schedule Options
Go to the current quarter Registration Preview page, which can be found under Manage on the navigation sidebar. The Registration Preview page shows details for courses and will highlight common issues like time conflicts between planned courses or registered courses.
Ensure you have scheduled courses in your plan
Schedule Builder will not be able to find any potential schedules if there are no courses in your plan. Find or add courses first to be able to view schedule options.
Review what filters have been added
Excluding too many days may result in limited schedule options. You can even include closed sections to your schedule options using filters.
Check your planned courses that are used to generate schedule options
Try adjusting your selected courses and / or filters to resolve having no schedule options.
The courses in your plan may not be offered this quarter and cannot be used to build a schedule.