Click on the sections below to view instructions for scheduling Zoom meetings and inviting participants.
If you require further assistance, please contact the UW-IT Service Center at help@uw.edu or 206-221-5000.
The following steps show you how to schedule a meeting using the Zoom software interface.
- After logging in to UW Zoom, bring up the Zoom home screen.
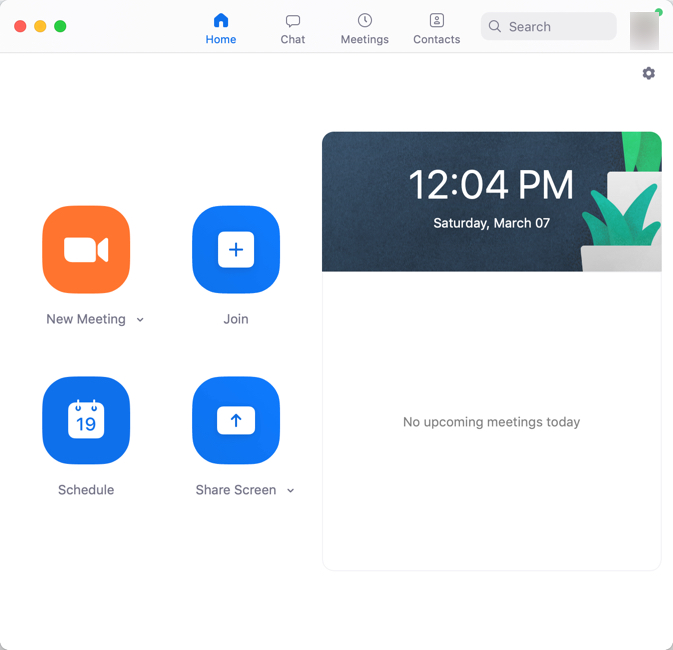
- On the lower left, click Schedule.
- Enter the required information in the dialog box, then click Schedule.
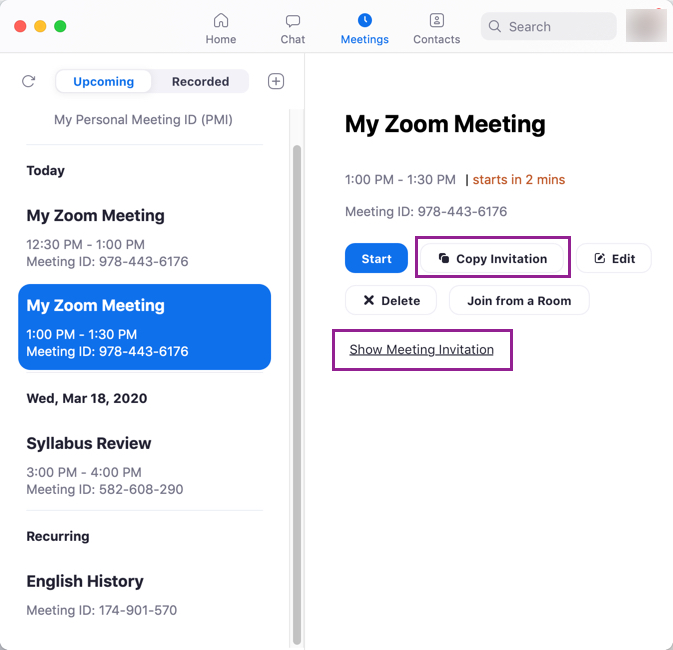
- Back on the Zoom home screen, in the top toolbar, click Meetings.

- To send an invitation to the meeting, select the meeting that you just created and click Copy Invitation. To view the meeting invitation text, click Show Meeting Invitation.
- Open your email program, then paste into a new message or meeting request. The copied text will appear similar to this. The link text (https://washington.zoom.us/j/1234567890) is the Meeting ID, which you would share with the people you want to invite to your meeting.
Your instructor is inviting you to a scheduled Zoom meeting. Topic: My Zoom Meeting Time: Mar 7, 2020 01:00 PM Eastern Time (US and Canada) Join Zoom Meeting https://washington.zoom.us/j/1234567890 Meeting ID: 978 443 6176 One tap mobile +16468769923,,9784436176# US (New York) +16699006833,,9784436176# US (San Jose) Dial by your location +1 646 876 9923 US (New York) +1 669 900 6833 US (San Jose) Meeting ID: 978 443 6176 Find your local number: https://washington.zoom.us/u/aeIZBnPCus - To start the meeting, from the Zoom home screen, click Meetings, then click Start.
Use Zoom’s Scheduling Privilege feature
Scheduling privilege is designed so:
- Similar to a meeting delegate, you can assign a user or multiple users in your account to schedule meetings on your behalf.
- Users with Scheduling Privilege on your account will be able to manage and act as an alternative host for all meetings they schedule for you.
- Users with Scheduling Privilege on your account will be able to access cloud recordings and meeting reports for all meetings they schedule for you.
Requirements:
- Both the assigned scheduler and the meeting host must have a Zoom License in the same UW Zoom account.
- For webinars, both users must have the webinar add-on.
- Learn how to set up Zoom scheduling privilege and assign meeting delegates to schedule Zoom meetings on your behalf.
When you’re planning to host events on UW Zoom that will include people without UW NetIDs, you will want to review a couple of settings to ensure that everyone you want to include can join easily: Waiting room and authentication.
If this is your first time using Zoom, learn how to sign in.
If you need help with setting up a UW Zoom meeting, learn how to schedule a meeting.
First, you will need to check your Zoom account to make sure that waiting room is enabled.
- Go to https://washington.zoom.us/profile/setting
- Click Security and scroll down to Waiting room.

- Make sure that the toggle switch to the right is turned on, as in the image above.
- To choose who will appear in the waiting room and who can bypass it, review the “Allow meeting participants to bypass the waiting room” document.

Now that you have configured settings for waiting room at the account level, you will do the same when you schedule the event.
- Go to https://washington.zoom.us/meeting/schedule.
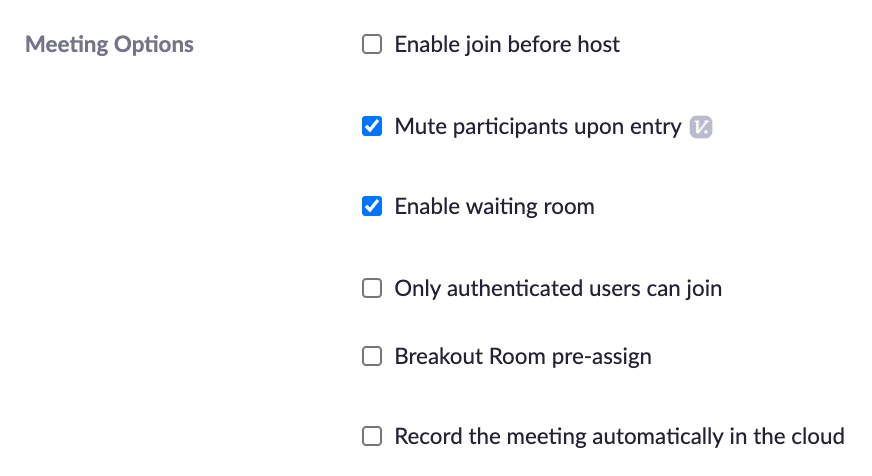
- Scroll down to Meeting Options.
- For the best and most secure experience, you’ll want to enable the Zoom waiting room and disable Only authenticated users can join.
- Once you have configured the settings as you want them, scroll down to click Save. You’re done!
Authentication Exception
As another option to invite non-UW guests to your UW Zoom events, you can add authentication exceptions to Zoom Events for which you have enabled authentication. Any users who are added as an authentication exception will receive a unique meeting link that will allow them to bypass authentication.
To add non-UW guest as an authentication exception to your meeting, follow these steps:
For a new meeting:
- Navigate to https://washington.zoom.us/meeting/schedule.
- Under the Security section, select the checkbox next to Require authentication to join.
- Next to Authentication Exception, click Add.
- Enter the guest participant’s name and email address.
- Click Save.
- Choose your other meeting settings, then click Save to schedule the meeting.
For an existing scheduled meeting:
- Sign in to the UW Zoom Web portal: https://washington.zoom.us.
- In the navigation menu, click Meetings.
- Locate the meeting you wish to add an authentication exception to, then click Edit.
- In the Edit Recurring Meeting dialog, click either Edit This Occurrence or Edit All Occurrences.
- Under the Security selection, select the checkbox next to Require authentication to join.
- Next to Authentication Exception, click Add.
- Enter the guest participant’s name and email address.
- (Optional) Click Add Participant to add more exceptions.
- Click Save.
- To apply your changes, click on Save at the bottom of the meeting page.
About the recommended settings
Mute participants upon entry
This setting is optional; it simply reduces the amount of noise generated as people join the meeting. Even when this setting is on, users can turn their microphones back on as soon as they join.
Enable waiting room
Enable the waiting room to allow guests who do not have a UW NetID to join the event. Users without a UW NetID will joining the event then will wait to be admitted by the host. As such users join, you will receive a notification that they are waiting.
Use the Scheduling Privilege setting to transfer ownership of a meeting or webinar to another licensed UW Zoom user. This can be helpful prior to changing roles or leaving UW.
Cloud recordings and reports cannot be transferred to another UW Zoom user using the Scheduling Privilege setting. To transfer ownership of cloud recordings and reports, download the cloud recording and/or report and share using a UW online file sharing service.
Requirements
- Meeting transfers: both the current and new meeting owner must be licensed and in the same UW Zoom account.
- Webinar transfers: both the current and new webinar owner must have the webinar add-on license and be in the same UW Zoom account.
Transfer meeting ownership using Scheduling Privilege
The new meeting owner first provides the current meeting owner the ability to transfer the meeting.
- The new meeting owner logs into UW Zoom with their UW NetID.
- On the left-navigation menu, click Settings.
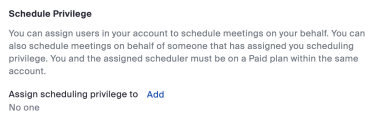
- On the Meeting settings page, click Other to jump to the Schedule Privilege setting.
- Next to Assign scheduling privilege to, click Add.
- Under users, enter the UW email address of the current meeting owner. To confirm, click the name and email under where the email address is entered.
- Click Save.
- To allow the new meeting owner to access cloud recordings and reports for meetings they schedule, enable these check boxes and click Save. The new meeting owner will only be able to access recordings for meetings they schedule. Previously recordings will remain in the original meeting owner’s Zoom account.

The current meeting owner now has the ability to transfer the meeting to the new meeting owner.
- The current meeting owner logs into UW Zoom with their UW NetID.
- Click Meetings.
- Hover the cursor over the event title, then click Edit. If this is a recurring meeting and you want to transfer all future meetings, click edit all occurrences.
- From the dropdown list Schedule For, click the arrow to expand the dropdown list, then choose the new owner’s name.
- Click Save.
The new meeting owner now has the meeting on their Zoom meetings page and the transfer is complete.