The Managed Workstation (MWS) VPN service is separate from the Husky OnNet VPN service. Managed Workstation provides VPN services for Windows based clients only. The MWS VPN has tight Windows authentication integration, and higher bandwidth in compared to the Husky OnNet VPN service. You may be eligible for both Husky OnNet and the MWS VPN–which VPN service you wish to use is up to you.
Connecting to the MWS VPN is simple, just follow these steps:
-
- Click on the Network Icon in the bottom-right hand corner of your screen.
- Click on the Managed Workstation VPN and click Connect

-
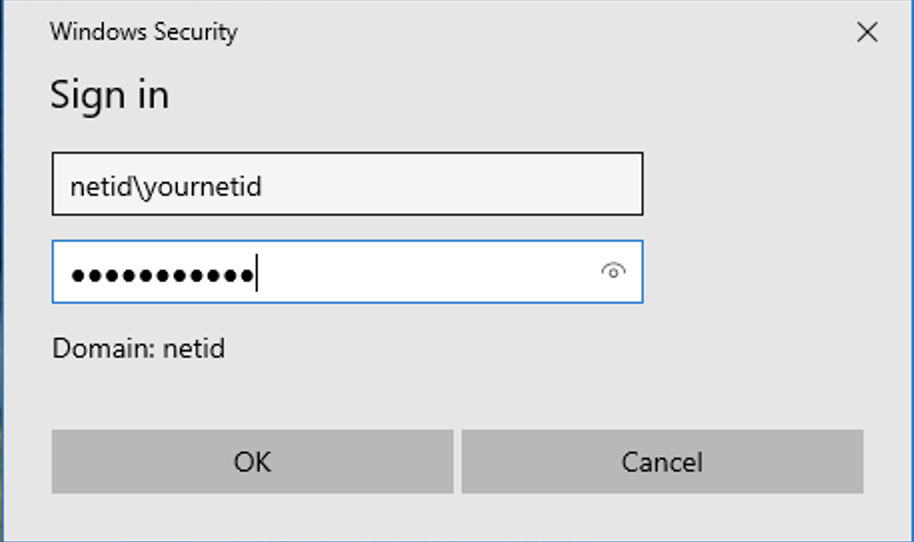
- Enter your credentials, making sure to enter your username in the format: netid\yournetid, then click OK to finish connecting
To disconnect, follow steps 1 and 2 above but hit “Disconnect” instead.
To be eligible to use the MWS VPN Service, you must:
- Be an eligible user of the Managed Workstation service by belonging to a MWS department, or you may belong to a department that has purchased the MWS VPN ala carte.
- Run Windows 10 or Windows 7 on both the MWS computer you are using and the computer you will be using to VPN.
- Have the VPN client installed on your MWS computer. This is a standard install on all managed workstations. If it is not installed, please see the instructions below for installing it on Windows 7 and Windows 10.
Installing the MWS VPN
If you are using these instructions to re-install the MWS VPN, you should remove any existing “Nebula” or “NETID” VPN connections before configuring a new VPN connection.
Windows 10
- Click on Start > Settings > Network & Internet > VPN (remove existing connections here)
- Click on + Add a VPN connection
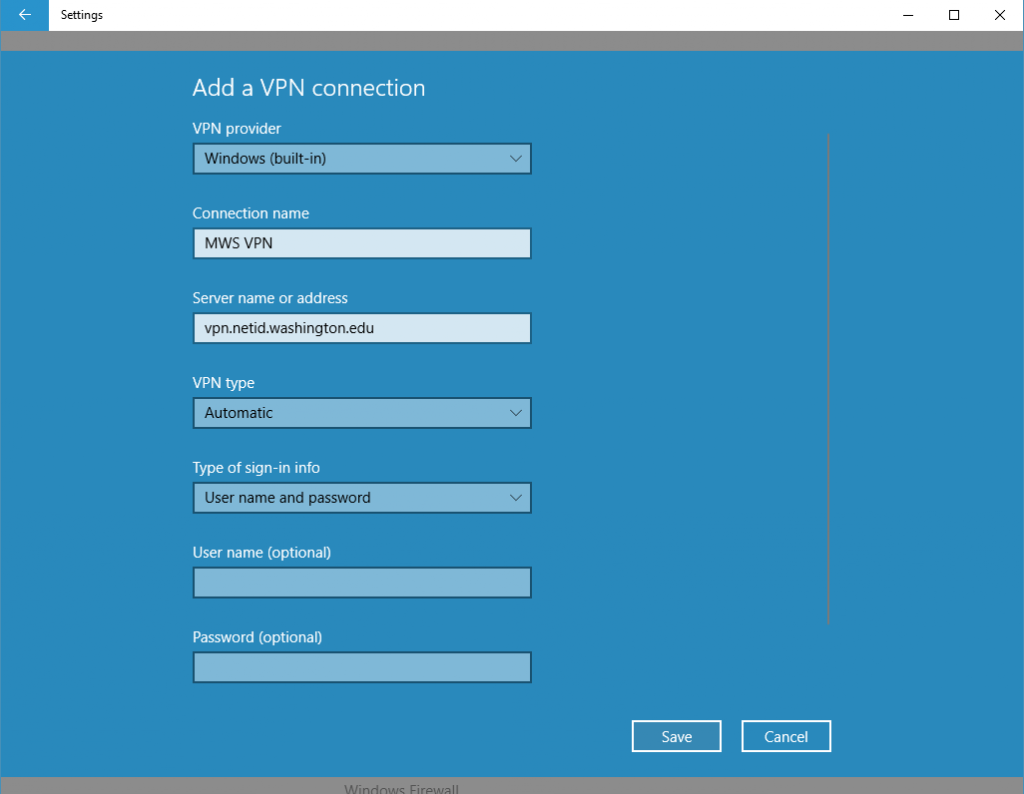
- Fill in the following fields:
- VPN Provider: From the drop down menu, select Windows (built-in)
- Connection name: MWS VPN
- Server name or address: vpn.netid.washington.edu
- VPN type: Automatic
- Type of sign-in info: User name and password
- Click Save
- In the same window, click Change adapter options in the Related settings section in the lower half of the window.
- The Network Connections Window will open. Locate the MWS VPN that we just created, right click on it and choose Properties
- On the MWS VPN Properties window, make the following changes:
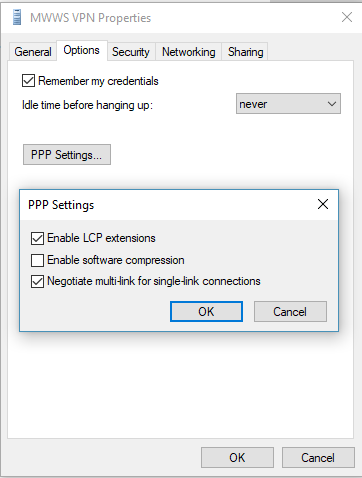
- Under the Options tab
- Click the PPP Settings button, both Enable LCP extensions and Negotiate multi-link… should be checked, click OK
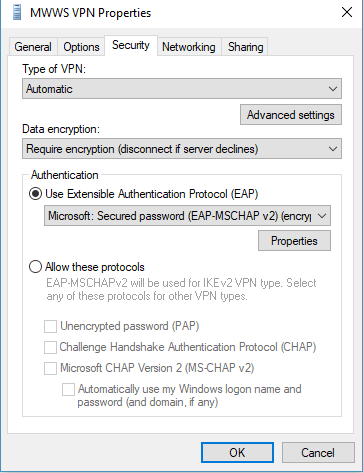
- Under the Security tab:
- Data Encryption: Require encryption (disconnect if server declines)
- Authentication: Click the radio button for Use Extensible Authentication Protocol (EAP) the drop-down list should change to Microsoft: Secured password (EAP-MSCHAPv2)
- Click OK
- Under the Options tab
- Close this window or double click on the MWS VPN connection to go back to the VPN window and test your connection.

If presented with a choice of Public, Home, or Work network, choose the type of network that more closely resembles the physical network you are using. If you are using a network in a coffee shop, choose Public. If you are at home, you can choose the Home network. Public is always the most secure choice if you have any doubts.
Using MWS VPN from non-Managed Workstation systems
Basic support for the MWS VPN is available for non-MWS computers, however, extended support is subject to MWS consulting rates.
The MWS VPN works well in many situations, but from non-MWS computers:
- You will not see your H: and I: drive mounts.
- You must ensure your computer is patched and using a current anti-virus program; see more details on UW policy.
- Delete all current VPN connections:
- Open Control Panel
- Change “View by:” in the upper right corner from Categories to Icons
- Open Network and Sharing Center
- Click on the Change Adapter Settings in the left column
- Right-click on the VPN icon(s)
- Choose Delete
- Click on Yes to confirm
- Restart the computer
- Recreate a new VPN connection per the instructions How do I install the MWS VPN? above
If the VPN appears to have connected with no error messages but you do not have your H: and I: drives visible, you have two options:
- Connecting to the MWS VPN from the workstation logon: These instructions work from Windows 7 or 10:
- After computer start-up, click the Switch User button.
- Near the bottom right side of the screen near the “Power” button click on the blue “Network Logon” button.
- This will initiate a VPN session. Log in with your UW NetID credentials as usual.
Connecting to the MWS VPN right from your workstation logon has some advantages, including:
- Your drives will be mapped (this benefit persists after you connect using this method once)
- You won’t be re-prompted to enter your NETID credentials for any network resource that requires them
- You can manually add the H: and I: drives
Preparation
- Create a Folder in which to save the PowerShell Script (the email attachment or file download)
- Right-click in any clear area of your Desktop. Choose Personalize. The Personalization window will open.
- Click on “Themes” on the left side navigation pane.
- Click on “Desktop icon settings” under the “Related Settings” header.
- Check the boxes for “Computer” and “Control Panel” then click OK.
- Double-click on the new “Computer” or “This PC” icon on your desktop
- Double-click on the C: drive
- Click on the Home tab
- Click on the New Folder icon
- Name the folder Bin
- Save the file (instructions are for Outlook)
- If you received the file as an email attachment, right-click on the attachment name
- Choose Save-As
- Browse to C:\Bin
- Double-click on the C:\Bin folder to open it
- Click the Save button
- Make the full file name visible
- Double-click on the desktop Control Panel icon you created in Step 1
- In the upper right corner, change the View by from “Category” to one of the icon choices
- Click on the Folder Options icon
- Click on the View tab
- Uncheck the box that says “Hide extensions for known file types”
- Click OK
- Close the Control Panel window
- NOTE: Leaving file extensions visible is OK, but if you want to re-hide them when you’re done, follow the steps in this section and recheck the box
- Create a Desktop Command Prompt shortcut
- Right-click on an empty area of your desktop
- Click New
- Choose Shortcut
- Type the following and then click Next: Cmd
- Accept the shortcut name or rename as you choose, then click Finish
- Right-click on an empty area of your desktop
- Save the attachment, Get-VpnEvents.ps1.mask, to the Bin folder you created in Step 1
- Rename the file to remove the “.mask” extension so that the file name is simply “Get-VpnEvents.ps1”
- Right-click on the file
- Choose Rename
- Hit the End key to move prompt to end of file name
- Back-space out the .mask characters
- Right-click on the Command Prompt you created in Preparation Step 3 above
- Choose “Run as Administrator”
- Click OK in the Permission request window that appears
- You will see a black window with a C:\Windows\system32> prompt
Running the PowerShell Script
- At the command prompt, type the following and press Enter: powershell
- After a few seconds, the prompt will change to “PS C:\Windows\system32>”
- Type the following and press Enter: cd \Bin
- Copy and paste* this line and hit Enter: Set-ExecutionPolicy -executionPolicy Unrestricted
- *To paste into the Command window, right-click in the window and choose paste
- Make sure you copy the entire text, including the punctuation
- Copy and paste this line and hit Enter: .\Get-VpnEvents.ps1 | out-file vpnEvents.txt
- Copy and paste* this line and hit Enter: Set-ExecutionPolicy -executionPolicy Restricted
- Type Exit and hit Enter to close PowerShell
- Type Exit and hit Enter again to close the Command window
Sending the Log File to UW-IT
- Open the UW Connect Request Email with which you’ve been corresponding with UW-IT
- Attach the vpnEvents.txt
- Choose Attach File in your reply
- Browse to C:\Bin
- Select the vpnEvents.txt file