This page covers using the Azure Portal to create an Entra ID application. This results in both an Entra ID application object and service principal object in the UW Entra ID tenant.
Note: This page re-iterates what Microsoft documents at https://docs.microsoft.com/en-us/azure/active-directory/develop/quickstart-register-app#register-an-application but with more screenshots. The Azure Portal experience tends to change a lot, so you may want to reference the MS docs if you find this doc is not in step with the experience you find.
Follow these steps to create the app registration:
- Sign in to the Azure portal.
- If you have access to multiple tenants, use the Directories + subscriptions filter
 in the top menu to switch to the tenant in which you want to register the application.
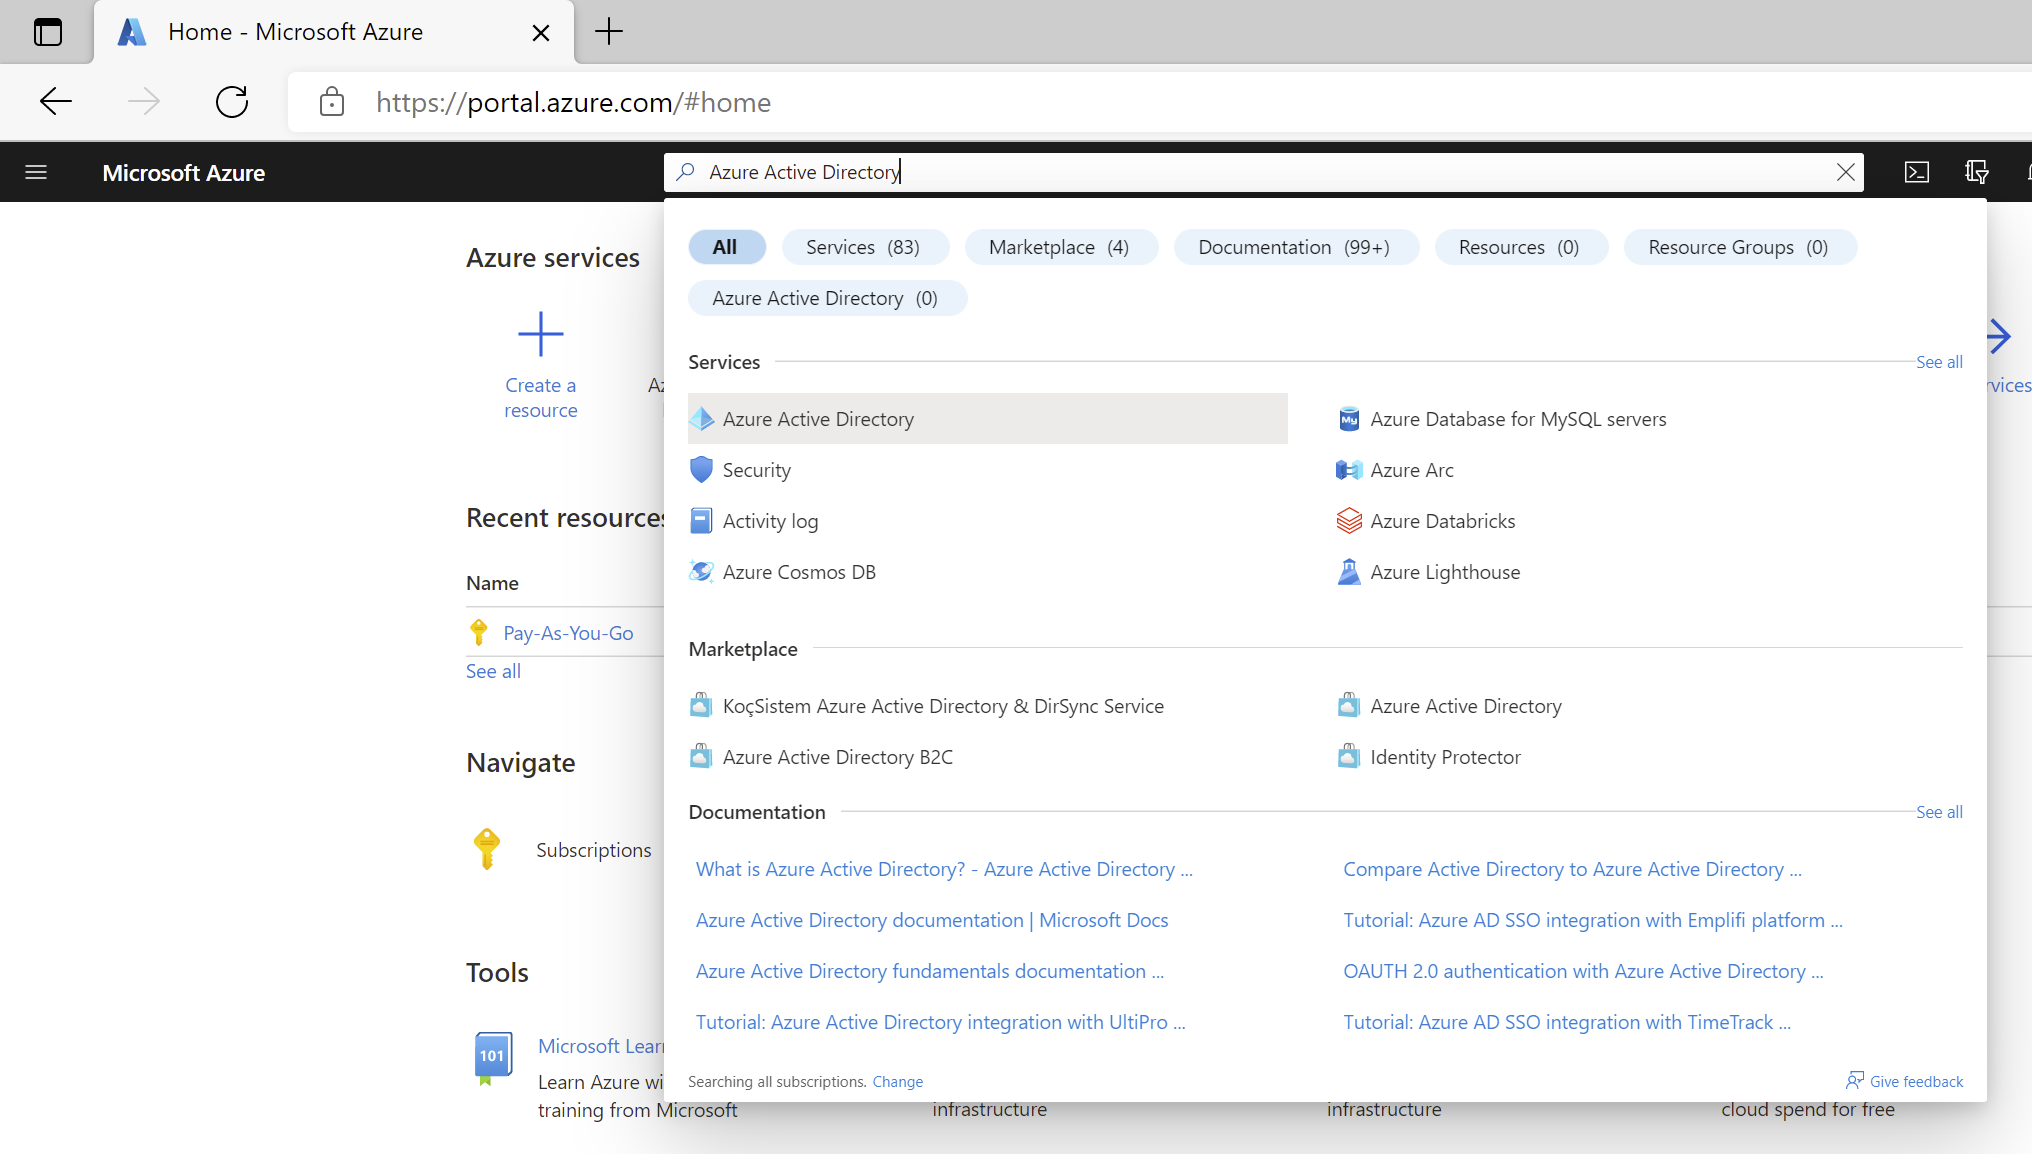
 - Search for and select Entra ID.
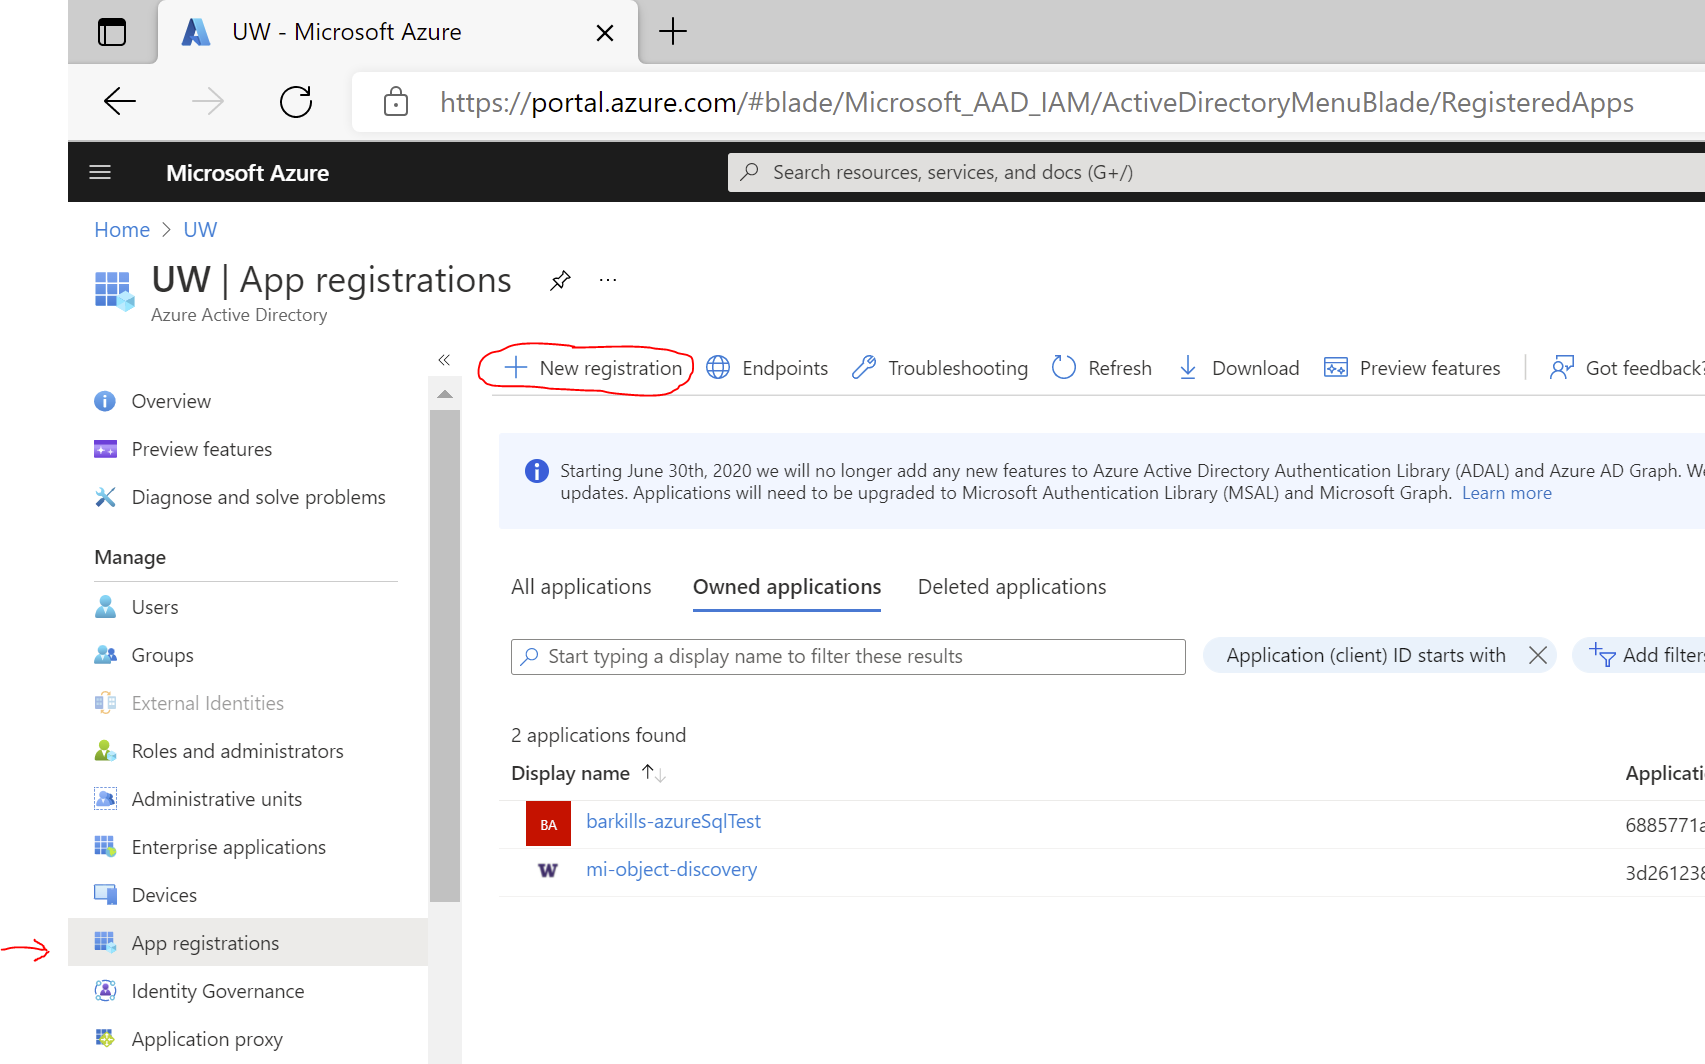
- Under Manage, select App registrations > New registration.
- Enter a display Name for your application. Users of your application might see the display name when they use the app, for example during sign-in. You can change the display name at any time and multiple app registrations can share the same name. The app registration’s automatically generated Application (client) ID, not its display name, uniquely identifies your app within the identity platform.
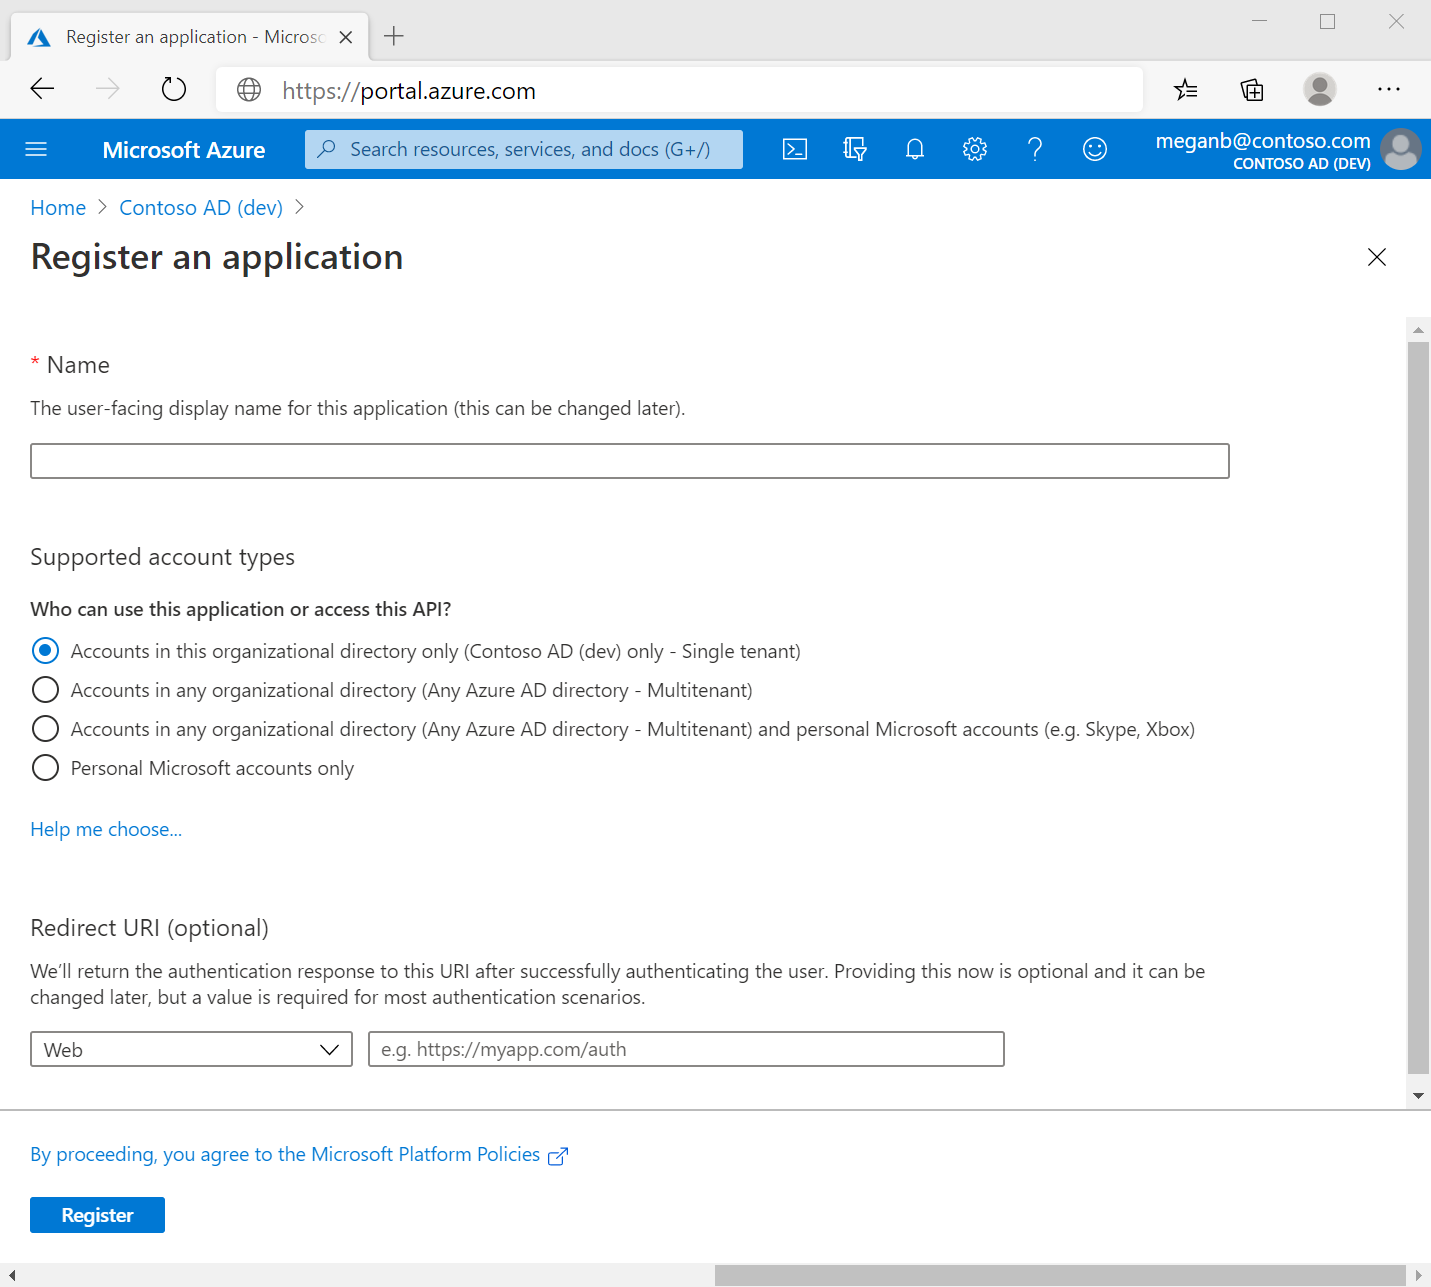
- Specify who can use the application, sometimes called its sign-in audience.
TABLE 1 Supported account types Description Accounts in this organizational directory only Select this option if you’re building an application for use only by users (or guests) in your tenant. Often called a line-of-business (LOB) application, this app is a single-tenant application in the Microsoft identity platform.
Accounts in any organizational directory Select this option if you want users in any Entra ID tenant to be able to use your application. This option is appropriate if, for example, you’re building a software-as-a-service (SaaS) application that you intend to provide to multiple organizations. This type of app is known as a multitenant application in the Microsoft identity platform.
Accounts in any organizational directory and personal Microsoft accounts Select this option to target the widest set of customers. By selecting this option, you’re registering a multitenant application that can also support users who have personal Microsoft accounts.
Personal Microsoft accounts Select this option if you’re building an application only for users who have personal Microsoft accounts. Personal Microsoft accounts include Skype, Xbox, Live, and Hotmail accounts. - Don’t enter anything for Redirect URI (optional). You’ll configure a redirect URI in the next section.
- Select Register to complete the initial app registration.
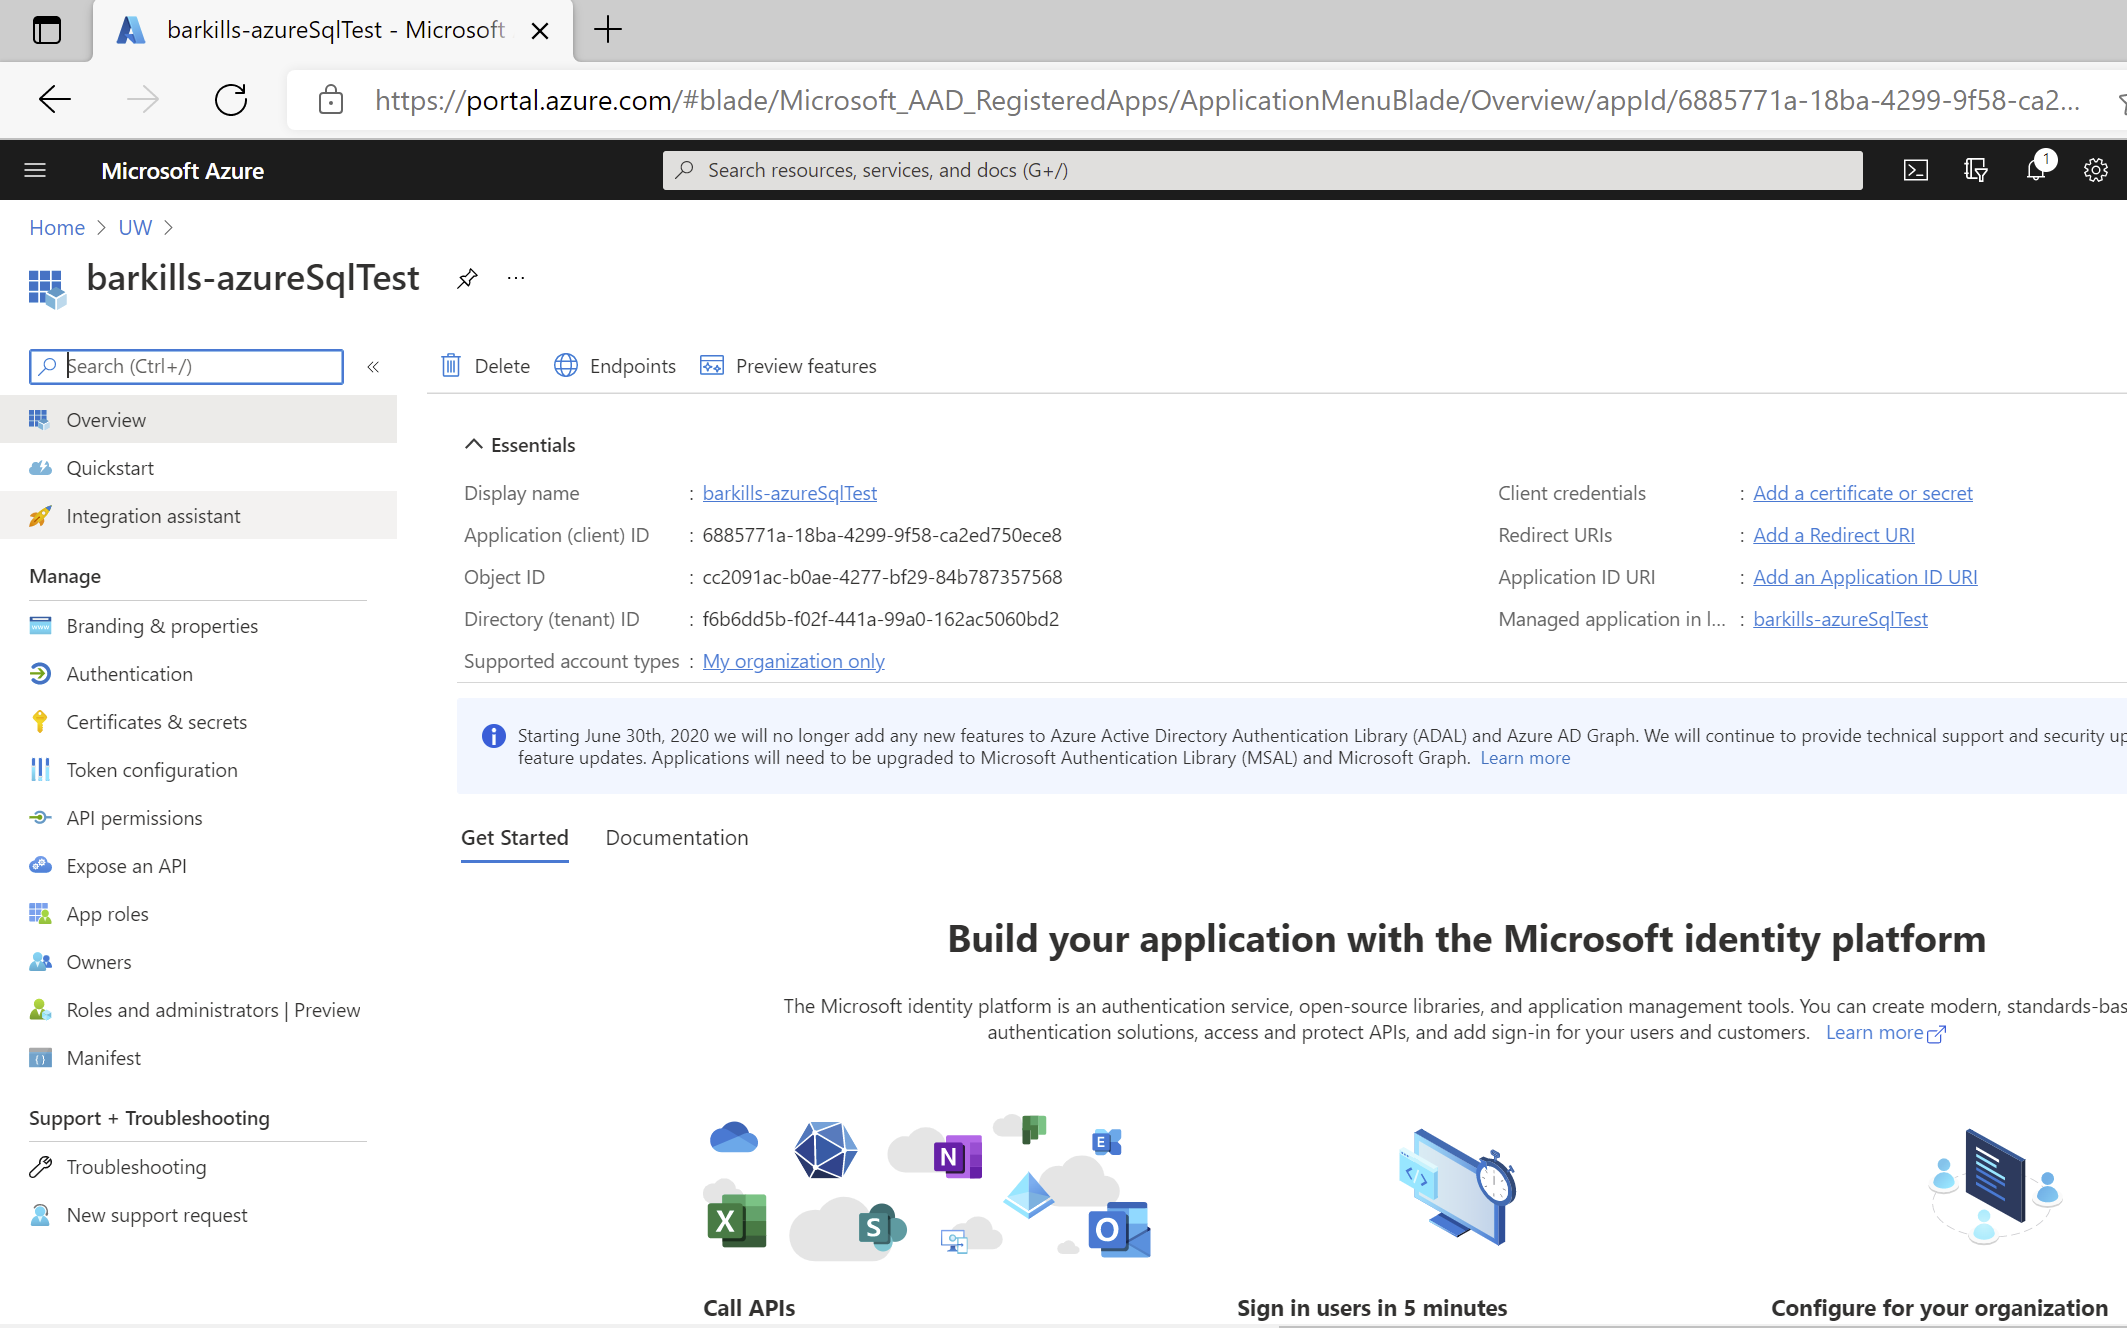
When registration finishes, the Azure portal displays the app registration’s Overview pane. You see the Application (client) ID. Also called the client ID, this value uniquely identifies your application in the Microsoft identity platform.