This section shows you how to do the following tasks: add data to a cell; move through cells; add rows and columns to a spreadsheet; cut, copy and paste cells; and resize columns and rows. It also shows you how to use the freeze panes feature, which allows you to freeze the column and row headings so that you navigate easily through a large worksheet.
Adding Data to a Cell
To add data to a cell, click the cell with the mouse and begin typing.
Moving Through Cells
To move through the worksheet cells, use the keyboard commands listed below.
| Movement Action | Key Combination |
| One cell up | up arrow key or + |
| One cell down | down arrow key or key |
| One cell left | left arrow key or + |
| One cell right | right arrow key or key |
| Top of the worksheet (cell A1) | + |
| End of the worksheet (last cell containing data) | <Ctrl< + |
| End of the row | + right arrow key |
| End of the column | + down arrow key |
Moving to a Specific Cell
To move to a specific cell:
- StepsActions
- Enter the cell address (cell letter followed by cell number) in the Name Box.

- Press Enter on your keyboard.
Adding a Row
A row runs horizontally across a worksheet. To add a row to a worksheet:
- StepsActions
- Click the worksheet where you would like the row to appear.
- Click the Home tab.
- Click the arrow on the Insert button in the Cells group.
- Click Insert Sheet Rows
Note: Doing this will insert a row above the cell that is currently selected.

Adding a Column
A column runs vertically down a worksheet. To add a column:
- StepsActions
- Click the worksheet where you would like the column to appear.
- Click the Home tab.
- Click the arrow on the Insert button in the Cells group.
- Click Insert Sheet Columns
Note: Doing this will insert a column to the left of the cell that is currently selected.
Shortcut Menu
To insert rows or columns using the shortcut menu:
- StepsActions
- Click the row number or column letter where you would like the new row or column to appear.
- Right-click the row number/column letter if you are using a PC, or control-click the row number/column letter if you are using a Mac. A shortcut menu will open.
- Click Insert from the shortcut menu.
- Note for rows: Doing this will add the row above the row you selected.
- Note for columns: Doing this will add the column to the left of the column you selected
Resizing a Column
To resize a column:
- StepsActions
- Click anywhere on the worksheet to select it.
- Hold your mouse over the boundary of the column heading until the mouse changes to a plus sign.
- Click and drag until you are happy with the width of the column.
To change the width of multiple columns at once, select the column headings you want to change, and then click and drag one of the columns to the desired width.
Resizing a Row
To resize a row:
- StepsActions
- Click anywhere on the worksheet to select it.
- Hold your mouse over the boundary of the row heading until the mouse changes to a plus sign.
- Click and drag until you are happy with the width of the row.
To change the width of multiple rows at once, select the row headings you want to change, and then click and drag one of the rows to the desired width.
Selecting a Cell
Before you can modify or format a cell, you must first select it. The table below will show you the quickest way to select cells.
| Cells to Select | Mouse Action |
| One cell | Click once in the cell |
| Entire row | Click the row heading |
| Entire column | Click the column heading |
| Entire worksheet | Click the Select All button located above the row headings and to the left of the column headings, or press Ctrl + A on your keyboard. |
| Cluster of cells | Click and drag the mouse over the cell cluster |
Cutting, Copying, & Pasting Cells
To move cells from one location to another on a worksheet, you must first cut or copy the cell(s), and then paste the cell(s) to its new location.
To cut a cell:
- StepsActions
- Click the cell to select it.
- Click the Home tab.
- Click the Cut button from the Clipboard group, or press Ctrl + X on your keyboard.
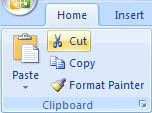
The cell will now have a flashing dotted border around it.
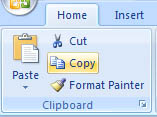
To copy a cell:
- StepsActions
- Click the cell to select it.
- Click the Home tab.
- Click the Copy button from the Clipboard group, or press Ctrl + C on your keyboard.
To paste a cut or copied cell to a new location on your worksheet:
- StepsActions
- Click the new location on your worksheet to select it.
- Click the Home tab.
- Click the Paste button from the Clipboard group, or press Ctrl + V on your keyboard.
If you are moving the cell contents only a short distance, the drag-and-drop method may be easier.
- StepsActions
- Click the cell you want to move. A black border will appear around the edges of the cell.
- Click the black border of the cell and drag it to the new location.
Keeping Headings Visible
If you have a large worksheet with many column and row headings, those headings will disappear as the worksheet is scrolled. If you would like the headings to remain visible at all times, you can use the Freeze Panes feature. The column and row headings have to be frozen separately.
To freeze the row headings:
- StepsActions
- Click the heading of Row 1, on the left of the worksheet.
- Click the View tab.
- Click the Freeze Panes button from the Window group.
- Click Freeze Top Row.
To freeze the column headings:
- StepsActions
- Click the heading of Column A, on the top of the worksheet.
- Click the View tab.
- Click the Freeze Panes button from the Window group.
- Click Freeze First Column.
If you want to unfreeze a row, click the Freeze Panes button on the View tab, and then click Unfreeze Pane.