The options for formatting cells can be accessed from the Format Cells dialog box. To open the Format Cells dialog box, do one of the following.
- Select the cell you want to format. PC users: right-click the cell. Mac users: press Control and click the cell. From the shortcut menu, click Format Cells.
- On the Home tab, in the Number group, click the arrow
 .
.
 .
.
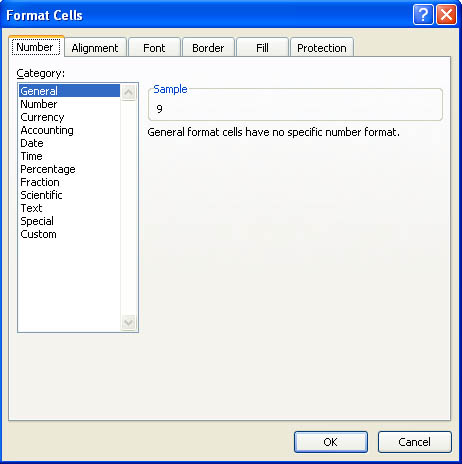
The Format Cells dialog box has the following options for formatting cells:
- Number tab – allows you to specify the numerical data type, for example currency, date, percentage.
- Alignment tab – allows you to change the position and alignment of the data within a cell.
- Font tab – allows you to change the attributes of cell font, including font face, size, style, and color.
- Border – allows you to select a border style for your cell from a variety of different options.
- Fill – allows you to add shading and background colors to a cell.
- Protection – allows you to lock or hide a cell.
Dates and Times
By default, Excel enters dates into a spreadsheet in the following format, 1-Jan-01. Even if you enter the date as “January 1, 2001,” Excel will automatically recognize the text as a date and change it to “1-Jan-01”. If you would like to use a different date format:
- StepsActions
- Click the cell you want to add the new date format to.
- Click the Home tab.
- In the Cells group, click Format.
- Click Format Cells. The Format Cells dialog box will open.
- Click the Number tab.
- On the Category menu, click Date.
- Click the date format you want from the list.
- Click OK.

Excel also enters times in a specific way. If you would like to use a different time format, follow the steps above, but choose Time from the Category menu.
Styles
Excel provides you with a number of preset styles for formatting your worksheet quickly and easily. The styles also help give your spreadsheet a professional and consistent look.
To add a preset style to a cell, or group of cells, in your worksheet:
- StepsActions
- Click the cell to select it.
- Click the Home tab.
- In the Styles group, click Format as Table. A menu opens, showing the available cell styles. To preview a style, hold the mouse over the menu option.
- Choose the style you want by clicking it.
To add a preset style to the entire worksheet:
- StepsActions
- Select all the cells in your worksheet by pressing CTRL + A on your keyboard.
- Click the Home tab.
- In the Styles group, click Format as Table. A menu opens, showing the available formatting options. To see a preview of a style, hold the mouse over the menu option.
- Choose the style you want by clicking it.
Format Painter
If you have formatted a cell with a certain font style, date format, border, or other formatting options, and you want to format another cell or group of cells the same way, you can use the Format Painter tool.
- StepsActions
- Click the cursor inside the cell containing the format you want to copy.
- On the Home tab, click Format Painter
 . Your cursor will now have a paintbrush beside it.
 - Select the cells you want to format.
To copy the formatting to many groups of cells, double-click the Format Painter button. The format painter will remain active until you press the key.