Objectives
- To create a fairly complex object from simple shapes such as circles, rectangles, and polygons.
- To learn to use the Pathfinder palette to create advanced shapes.
- To gain familiarity creating, manipulating, and combining shapes.
- To gain familiarity selecting and moving objects.
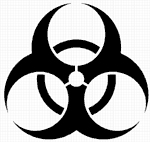 |
In this lesson, you will be creating a biohazard symbol using concepts from the previous tutorials. As stated in earlier tutorials, complex objects are usually composed of less complex shapes. Although a biohazard symbol is a bit more complex than the objects created in previous tutorials, the process of creating the previous shapes can be applied to this object (and others). Just remember: when creating objects, analyze the structure, look for basic shapes, and tackle one section at a time. We’ve made some shapes to save time, but you may want to study the basic shapes first. |
First, download and open biohazard.ai. You should see many different shapes in separate layers. Next, enable the grid (View > Show Grid), Snap To Grid (View > Snap to Grid), and Guides (View > Guides > Show Guides) if they aren’t enabled already. You can look at the different shapes on the different layers by clicking on the Eye icon ( ) next to a layer in the Layers palette. When you are ready to begin, turn off the visibility by clicking on the Eye icon for all the layers, except the “Guides” layer and “Layer 2.”
- StepsActions
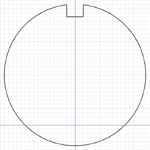
- Select the large circle and rectangle shapes in Layer 2. Subtract the rectangle from the circle using the Pathfinder palette tools.
- Select the merged shape. Choose the Rotate tool (R) and hold down the key while you click where the two guides intersect. This does two things: a) it moves the pivot point to where you clicked, and b) brings up the Rotate dialog for you to enter a specific rotation degree and preview settings changes. Check the Preview box, and enter 120 as the Angle. Click Copy to make a rotated copy of the original shape.
- You can rotate the second shape using the same procedure above, or simply use Object > Transform > Transform Again (D (Windows) orD (Mac OS)). Then select the notched circles and merge them.
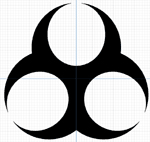
- Make Layer 3 visible. Rotate and copy Layer 3’s ellipse using the same techniques outlined above. Then merge the three ellipses using the Pathfinder palette. Be careful not to select the larger shape from Layer 2! locking or hiding Layer 2 will help keep you from selecting anything on it.
- Subtract the three inner ellipses in Layer 3 from the larger shape on Layer 2. You should now be able to see a general biohazard shape.
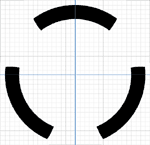
- On Layer 4, subtract the small circle from the larger shape. On Layer 5, rotate and copy the rectangle. Merge the two rectangles, and subtract them from the emerging biohazard shape.
- On Layer 6, select the two circles. Right-click on the artboard and select Make Compound Path from the context menu to make a doughnut-shaped object (subtracting the smaller circle from the larger circle would accomplish the same thing).
- Also on Layer 6, select the ellipse. Hold down the and keys, and scale the ellipse a little smaller (holding down constrains it to a center point and holding down constrains the proportions).
- Select the ellipse and doughnut shape. Click on the Intersect shape areas in the Pathfinder palette. Rotate and copy the resulting shape.
- Finally, select all of the shapes and merge them.