With Panopto’s offline functionality, you can record audio, video, screen images, or PowerPoint slides even when you do not have network connectivity. The system will capture the content and store the material locally on the recording computer. Once you restore network connectivity, chose a destination folder for the recording, and start the upload.
Record offline
- StepsActions
- Before you are offline, make sure you have downloaded the latest recorder.
- Create your recording.
- After recording, you will see the Offline Recording Complete box where you may give your session a name (optional) and click Done. Tip: Keep the Manage Recordings box open so you will remember to upload the recording when you are online next.
Upload your recording
- StepsActions
- When you have internet access, open the Manage Recordings box in the Panopto recorder. To open the Panopto recorder, see the first four steps of the Create your recording page. On a Mac, click the Manage Recordings link, on a Windows computer, select the Manage Recordings tab.
- If you haven’t already logged in click the Sign in to Upload button and log in.
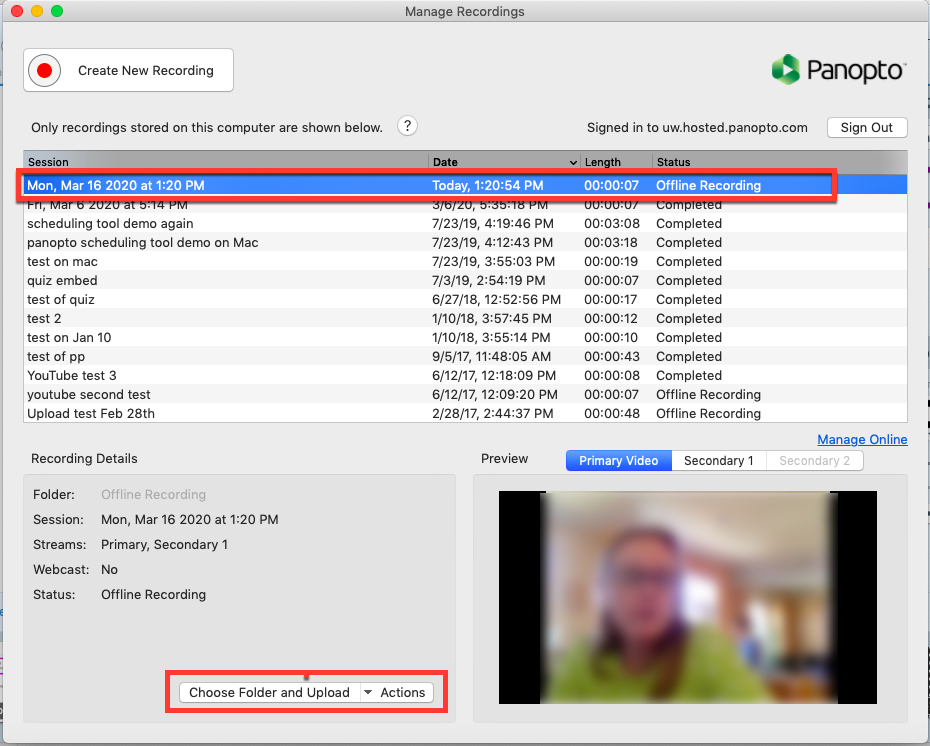
- Select the recording and specify the folder. On a Mac, select the folder in the lower left section.

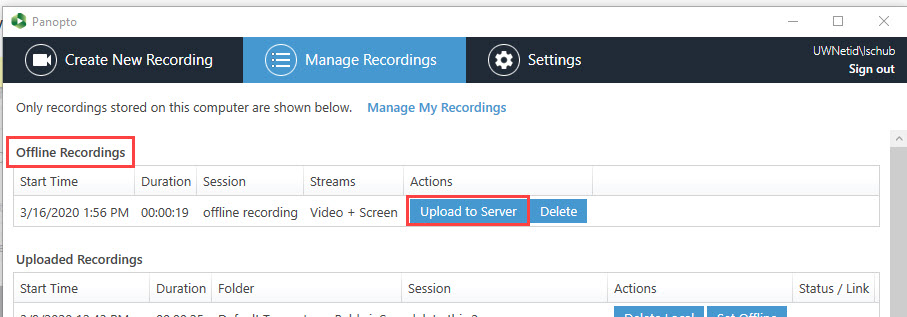
Upload recording on a Mac On a PC, click the Upload to Server button and select the folder on the pop-up window.
Upload recordings on a Windows computer - Click Upload.
- When the upload is complete, your recording will be available in your chosen folder.